VoiceOver on New MacBook Pro with Touch Bar: First Impressions

I finally had a chance to stop by an Apple Store to give the new MacBook Pro with the Touch Bar a try with VoiceOver. What follows is a summary of my initial experience, rather than a comprehensive review. If you do want to read a comprehensive review of these new Touch Bar MacBook Pros from a non-accessibility perspective, there are several of those around, including this excellent one by Jason Snell at Six Colors.

Your first question when you try out this new laptop for the first time is probably going to be: how do I perform the Command F5 shortcut to turn  VoiceOver on without the hardware function keys? Well, if you have been using an iOS device, the answer will sound familiar. It involves a triple-click of the Touch ID button located on the right side of the Touch Bar (this button doubles as the power button for the laptop as well). This is similar to how you use the Home button on iOS devices for the Accessibility Shortcut. The only difference on the Mac is that you have to hold down the Command key as you perform the triple-click on the Touch ID button. The Touch ID/power button is the only part of the Touch Bar that can click with a press. It is separated from the rest of the Touch Bar by a small gap that feels like a notch. I tried to take a photo in the bright lighting of the Apple Store.

Closeup of right side of MacBook Pro Touch Bar showing how Touch ID/power button is separated from rest of Touch Bar.

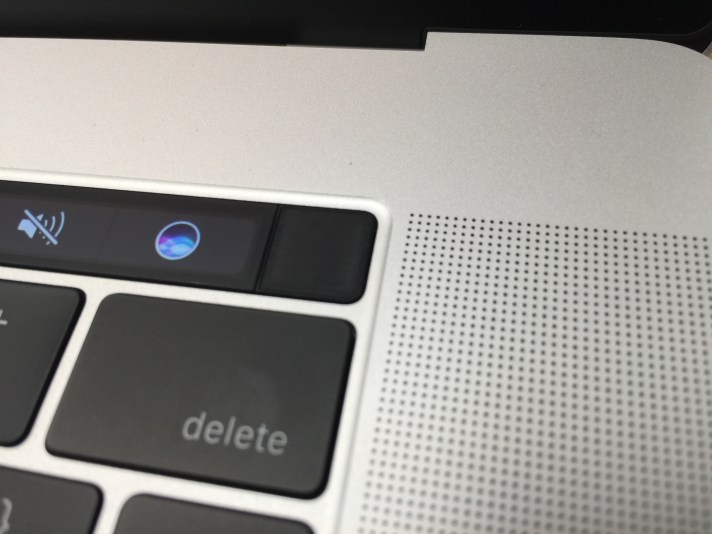
By default, the Touch Bar will display a set of five buttons on the right side. This is known as the Control Strip, a set of the most frequently used items that is similar in function to the Dock on an iOS device. From right to left, the buttons shown by default are: Siri, Mute, Volume, and Screen Brightness. A fifth narrower button expands the Control Strip and shows more options. When the Control Strip is expanded, it pretty much mirrors the media keys previously available on a laptop with physical keys –  with options such as keyboard brightness, Mission Control, Exposé, and media playback (Play/Pause, Previous and Next). The Close (X) button found on the left edge of the Touch Bar will collapse the Control Strip from its expanded state. The Control Strip is user-configurable, meaning you can swap out the default buttons for other options you use more often.

Closeup of right side of the Touch Bar showing Siri, Mute, Volume, Screen Brightness and More buttons.

Closed up of Touch Bar with More Options expanded.

If you are a fan of the Escape key, you will be happy to know it is still around, just in a different form. You will usually find it on the left side of the Touch Bar (at times it may be replaced by a Close (X) button).

Closeup of left side of the Touch Bar showing a software Escape key

Interacting with the Touch Bar’s software buttons while VoiceOver is turned on will again seem familiar for iOS users. Just like on an iPhone or iPad, you can move your finger over different areas of the Touch Bar to hear each key or button spoken aloud as you go over it with your finger, or you can use flick gestures to move the VoiceOver cursor from item to item. Once the desired item has focus, you can then double-tap anywhere on the Touch Bar (or even Split Tap) to make a selection.

With many of the buttons on the Touch Bar, selecting them will open a slider for adjusting the values for a given setting (volume, screen brightness, and so on). You will need to use a special gesture to interact with that slider. This gesture consists of a double-tap and hold followed by sliding your finger over the Touch Bar without letting go, which will adjust the value of the slider. When you let go with your finger, the slider may close automatically, or you can use the Close (X) button to its right. The special gesture for interacting with a slider is required because of the limited vertical space on the Touch Bar. On an iOS device, you would typically move the VoiceOver cursor to the slider and then flick up or down with one finger to adjust its value.

Brightness slider, with Close button on the right.

As with the Escape key, the Function keys are still around as well, but they are only accessible when you Hold down the  Function key on the keyboard. I recorded a short clip to show that in action.

https://youtu.be/LyrYI_hq9sc

Any of the VoiceOver keyboard shortcuts that use the Function keys still work, you just have to add one more key (Function) to the shortcut and then select the desired function key on the Touch Bar using an iOS-style double-tap. For example, to bring up the VoiceOver Utility, the keyboard shortcut is VO (Control + Option) F8. With the Touch Bar, you will press and hold VO (Control + Option) along with the Function key, then select F8 on the Touch Bar as you would on an iOS device (by double-tapping once it has focus). It took me a few minutes to get the hang of this, but I’m sure it will become more ingrained with practice if I ever get one of these machines and use it day in day out.

  • Note: As noted by @IAmr1A2 on Twitter, you can also use the number keys to perform a VoiceOver command that uses the function keys. For example, the command mentioned above would be VO + Function + 8.

The real power of the Touch Bar lies in the fact that it can morph into a variety of controls depending on the app that is open. Due to time constraints, I was not able to try the Touch Bar with as many apps as I would have liked during my visit. That will have to wait for another time. I did open up GarageBand and had no problems accessing any of the items on the Touch Bar with VoiceOver. With Photos, the only item I could not access was the slider for scrubbing through the photos collection.

Apple has made available a knowledge base article with additional information on using not only VoiceOver but also Zoom and Switch Control with the Touch Bar. I especially look forward to trying out Zoom on a future visit to the Apple Store, as I already know I will probably need to use this feature quite often due to the small size and dim appearance of the Touch Bar (especially when options are dimmed).

For the first few minutes using the Touch Bar, it felt like I was using two devices side by side as I interacted with the new MacBook Pro with VoiceOver, each with its own already familiar interaction model: the keyboard input method laptops have used for  decades, and the touch input method more recently introduced with iOS devices such as the iPhone. While these two input methods were each already really familiar to me, putting them together into a seamless interaction with the new laptop took me a little while.  As with any new interaction method, I know it will take me some time to build the same kind of muscle memory I have developed with the now familiar Trackpad Commander feature (which allows me to use iOS-style gestures performed on the Trackpad as alternatives to many VoiceOver keyboard shortcuts). For now, I am happy to see that the Touch Bar is as accessible as Apple’s other interfaces, but I will need more time experimenting with it on a variety of apps before I can  decide that it is an essential tool that justifies the higher price of the models that include it.


4 New Accessibility Features of iOS 10 You Should Know

Apple today released iOS 10,  the latest version of its operating system for mobile devices such as the iPad and iPhone. This post is a quick review of some of the most significant enhancements to the accessibility support in iOS 10, starting with a brand new feature called Magnifier.

Magnifier

With Magnifier, users who have low vision can use the great camera on their devices to enlarge the text in menus, pill bottles, and other items where they might need a little support for their vision to read the content. Magnifier is found alongside Zoom (which enlarges onscreen content) in the Accessibility Settings. Once it is enabled, you can activate the Magnifier by triple-clicking the Home button.

While a number of existing apps such as Vision Assist and Better Vision provide similar functionality, having this functionality built into the OS should improve performance (through faster focusing, better clarity made possible by accessing the camera’s full native resolution, etc.). Magnifier has the following options:

  • a slider for adjusting the zoom level (or you can pinch in and out on the screen)
  • a shutter button that freezes the image for closer inspection – you can then pinch to zoom in on the captured image and drag on the screen with one finger to inspect a different part of it
  • a button for activating the device flash (on devices that have one) in torch mode  so that you get a bit more light in a dark environment
  • a button for locking the focus at a given focal length
  • a button for accessing a variety of filters or overlays

The available filters include: white/blue, yellow/blue, grayscale, yellow/black, and red/black. For each of these, you can press the Invert button to reverse the colors, and you can do this while in the live view or with a frozen image. Each filter also provides a set of sliders for adjusting the brightness and contrast as needed.

Display Accommodations

Display Accommodations is a new section in the Accessibility Settings that brings together a few existing display options (Invert Colors,  Grayscale, Reduce White Point) with a couple of new ones (Color Tint and and options for three different types of color-blindness).

Color filters pane has options for Grayscale and color blindness filters.

For those who have Irlen Syndrome (Visual Stress) there is a new option in iOS for adding a color tint over the entire display. Once you choose this option, you will be able to use a slider to specify the intensity and hue of the filter.

Color Filters with sliders for intensity and hue

Speech Enhancements

In addition to word by word highlighting, the text to speech options in iOS 10 (Speak Selection and Speak Screen) will now provide sentence by sentence highlighting as well. By choosing Highlight Content in the Speech Settings you can configure how the highlighting takes place: you can have only the words highlighted, only the sentences, or both, and you can choose whether the sentence highlight will be an underline or a background color (though you still can’t choose your own color).

A new Typing Feedback setting can help you if you find you are often entering the wrong text. You can choose to hear the last character or word you typed (or both). For the character feedback, you can specify a delay after which the character will be spoken and even whether a hint (“t, tango”) is provided. An additional setting allows you to hear the QuickType suggestions read aloud as you hover over them, to make sure you are choosing the right prediction.

The entire Speech system also can take advantage of some additional high quality voices: Allison, Ava, Fred, Susan, Tom and Victoria for U.S. English. Some of the voices (such as Allison) have both a default and an enhanced version as has been the case with previously introduced voices, and you preview each voice before downloading it by tapping a play button. An edit button allows you to remove voices you are not using if you are running low on space (you can always download them again).

VoiceOver Pronunciation Editor and New Voices

I’m sure the team at AppleVis will do a complete rundown of VoiceOver in iOS 10, so here I will just highlight one feature that I am really happy about: the new Pronunciation Editor. After all this time, I can finally get VoiceOver to get a little bit closer to the correct pronunciation for my name (the accent in Pérez still throws it off a little).

The Pronunciation Editor is found under VoiceOver > Speech > Pronunciations. Once there, you will press the Add (+) button, enter the phrase to be recognized and then either dictate or spell out the correct pronunciation. You can restrict the new pronunciation to specific Languages,  Voices and apps or choose All for each option for a more global availability.

In addition to the pronunciation editor, VoiceOver can take advantage of all the new voices for the Speech system in iOS 10: Allison, Ava, Fred, Susan, Tom and Victoria for U.S. English (each with an enhanced version). Like the Alex voice, you will have to download each of these new voices before you can use it, but you can  preview each voice before downloading it.

These are just a few of the new accessibility features in iOS 10. Others include:

  • the ability to auto-select the speaker for a call when you are not holding the iPhone to your ear.
  • an option for routing the audio for VoiceOver: you can hear the speech on one channel and the sound effects in the other when wearing headphones.
  • Switch access for Apple TV which will allow you to navigate the interface of the Apple TV using the Switch Control feature on your iOS device.
  • a new option for Switch Control Recipes that will allow to create a hold on point action right from the scanner menu. Before you could only crate a tap action in this way.

And of course, there are other enhancements to the rest of the Apple ecosystem which I will cover in their own blog posts as they become available: Siri for the Mac, Taptic Time for Apple Watch, new activity settings on Apple Watch for wheelchair users, and more.

Finally, there is the new hardware Apple just announced last week, which will soon be shipping. Apple Watch has a faster processor and a better display (helpful for those with low vision), and the iPhone 7 and 7 Plus come with even better cameras (12 MP, with two cameras for 2X zooming on the larger model). As both a visually impaired photographer and as someone who focuses on accessibility features that use the camera (Magnifier, Optical Character Recognition apps to convert print into digital content) this is very exciting.

What are your thoughts on Apple’s recent announcements? Are you upgrading to the new devices? Which features have you most excited?


Apple TV Remote App: Accessibility Quick Take

A new Apple TV Remote app is now available for download from the App Store. The main difference between this new app and the existing Remote app (which you can still use to control your Apple TV) is the addition of Siri functionality.  With the 4th generation Apple TV, you can press and hold an onscreen Siri button in the app to speak Siri requests on your iOS device that will be understood by your Apple TV. This works just like it does when you press and hold the physical button on the 4th generation Apple TV Siri remote.

Setup

Setup was a pretty simple process. Upon launching the app, it quickly recognized all of the Apple TVs on my Wifi network (I have one of each generation) and showed them as a list. After I tapped on the device I wanted to control, I was prompted to enter a four digit code shown on the Apple TV (and automatically read aloud by VoiceOver) and that was it: my iPhone was paired to control my Apple TV.

The App Layout

The app has a dark theme, with great contrast, throughout. As someone with low vision I can say the the options on the app are much easier for me to see than the dimly labeled buttons on the physical Apple TV remote.

Apple TV Remote app layout in standard mode

The screen is divided into two sections: the top two thirds make up a gesture area that simulates the touch pad on the physical remote, while the bottom third includes onscreen options for the buttons. If you can see the screen on your device, right away you will notice the Menu button is much bigger than the other buttons. This is actually a welcome design touch, as the Menu button is one of the most frequently used options for controlling the Apple TV. Below the Menu button, you will find options for Play/Pause, Home, and Siri from left to right.

I tried to test the app with Dynamic Text (large text) enabled. This only made the text in the devices list (which lists all of your Apple TVs) bigger. It would be nice if Dynamic Text worked on the label for the Menu button as well, but with the bigger button and high contrast look, this is just a minor point.

You control the Apple TV by performing touch gestures in the gesture area at the top of the screen. When you come across a text entry field, the onscreen keyboard will come up automatically to let you enter the text (same as on the older Remote app). If you tap Done to dismiss the onscreen keyboard, you can bring it back by tapping the keyboard icon at the top of the screen.

With games, you can tap a game controller icon at the top  of the screen to change the layout of the app for game play. With the iPhone in the landscape orientation and the Home button to the right, the left two thirds of the screen will be a gesture area and the right one third will include  Select (A) and Play/Pause (X) buttons – surprisingly these are not labeled for VoiceOver. Tapping Close in the upper right corner will  exit out of the game controller mode to the standard layout.

Apple TV Remote app layout in game controller mode

From the one game I tried with the app, Crossy Road, I don’t think it will be a good replacement for a dedicated controller. There was just too much lag, probably due to the Wifi connection the app uses to communicate with the Apple TV. It may work with some games where timing is not as crucial, but definitely not Crossy Road.

Zoom

Zoom will work just like it does when using the physical remote: a quick triple tap on the gesture area will zoom in and out. The one issue is that the gesture area on the app does not accept two finger gestures. As a result, you will not be able to:

  • turn panning on/off: this requires a two finger tap.
  • change the zoom level: this requires you to double-tap and hold with two fingers then slide up or down to adjust the zoom level.

VoiceOver

The same limitations hold for VoiceOver. You will not be able to access the Rotor gesture on the Apple TV Remote app. Furthermore, the following gestures will not be available:

  • pause/resume speech: this requires a two finger tap.
  • read all from the top/current location: this requires a two finger swipe up/down.

If you have used VoiceOver with the older Remote app, then you will be familiar with how navigation works in this new app. With VoiceOver turned on in both the iOS app and the Apple TV, select the gesture area on the iOS app. As you flick or explore by touch in the gesture area, VoiceOver will announce the item in the VoiceOver cursor on the TV. You can then double-tap anywhere on the gesture area to make a selection.

For Siri, you will have to perform a standard gesture (double-tap and hold) so that you can speak your Siri request.

One interesting thing about using VoiceOver with the new app is how you access the Accessibility Menu. When you select the Menu button it will announce “actions available.” With a one finger flick up or down you can access the two actions: the default, which is “activate item” or “accessibility menu.” Depending on how you have your Accessibility Shortcut set up in the Apple TV settings, selecting the “accessibility menu” option will either toggle on/off one of the features or bring up the accessibility menu to allow you to choose.

Switch Control

I was not able to use the new app to control my Apple TV with Switch Control. The problem is that when Switch Control goes into the gesture area it does not recognize my input as I try to select one of the direction arrows to move the cursor on the Apple TV. This could very well be a bug that is fixed in a future update. In the meantime, you can continue to use the older Remote app if you need Switch Control to use your Apple TV.

In any case, Apple has promised to include Switch Control when tvOS is updated in the fall. This will be different from the current implementation in that the scanning cursor will actually show up on the TV and the iOS device will act as a switch source (at least as I understand it from my online reading, I have not been able to update my Apple TV to the latest beta).

Apple TV Remote app with Switch Control turned on, showing direction arrows in gesture area.

Conclusion

To be honest, I don’t use the included physical remote for my Apple TV all that much. It is just too small and easy to misplace for me. I actually have my existing TV remote (which I am very familiar with) set up to control my Apple TV, and I also often use the older Remote app on my iPhone for the same purpose. With those two methods I was not able to use Siri, but now that has changed. I see myself using Siri a lot more with this new app, especially for searching on the Apple TV.

There are a few limitations that keep this app from being a full time replacement for the physical remote if you use Zoom and VoiceOver, but I anticipate that those will be addressed in future updates.

Are you using the new app? Let me know your experience in the comments, especially if you are using it with Zoom or VoiceOver. I would love to hear how it has worked out for you.

On the usability of touch screens to screen readers

Recently, Katie Sherwin of the Nielsen Norman Group published an article on the NNG website summarizing her experience with the VoiceOver screen reader for iOS devices, and her suggestions for designing better interactions for blind users. The article has some good design suggestions overall: creating cleaner copy with streamlined code is always a good thing. So is including alternative text for images, making sure all interactions work with the keyboard, and the hierarchy of the content is clearly  indicated by headings that separate it into logical sections. On these suggestions, I am in full agreement with the author.

Where I disagree with her is on the representation of what the experience of using a mobile device is really like for actual blind users. The author herself acknowledges that she only started experimenting with the screen reader after attending a conference and seeing how blind users interacted with their devices there. It is not clear how much time she has had to move beyond the most basic interactions with VoiceOver. Thus she states that “screen readers also present information in strict sequential order: users must patiently listen to the description of the page until they come across something that is interesting to them; ; they cannot directly select the most promising element without first attending to the elements that precede it. ”

This may be accurate if we are talking about someone who has just started using VoiceOver on an iPhone or iPad. It ignores  the existence of the Rotor gesture familiar to many power users of VoiceOver. With this gesture, users actually can scan the structure of a web page for the content they want to focus on. They can see how the page  is organized with headings and other structural elements such as lists, form elements and more.  Many users of VoiceOver also use the Item Chooser (a triple-tap with two fingers) to get an alphabetical list of the items on the screen. Both of these features, the Rotor and the Item Chooser, allow users to scan for content, rather than remaining limited to the sequential kind of interaction described in the NNG article.

As for the point about the cognitive load of the gestures used on a touch screen device like the iPhone, it should be pointed out that the number of gestures is actually quite small compared with the extensive list of keyboard shortcuts needed on other platforms. I do agree with the author that typing remains a challenge when using the onscreen keyboard, but there are other options available to make text entry easier: the user can choose to use any of the many Bluetooth keyboards available on the market for a more tactile experience; dictation is built in and has a pretty good level of accuracy for those who prefer using their voice; and new input modes introduced in iOS 8 and 9 allow for handwriting recognition as well as Braille input.

To help new users with the learning curve (and the cognitive load), Apple provides a built-in help feature that is only available in the VoiceOver settings when the feature is active. Once a user goes into the help, he or she can perform gestures to hear a description of what they do. Another benefit for users is the fact that many of the gestures are the same across the Apple ecosystem. Thus, a VoiceOver user can transfer much of what they have learned on an iOS device to the Mac, which has a trackpad roughly the size of an iPhone, the new Apple TV with its touchpad remote, and even the Apple Watch (with a few modifications to account for the limited screen real estate). Finally, I have found that learning the gestures is as much a  matter of muscle memory as it is about remembering the gestures and what they do. The more time you spend performing the gestures, the easier they become. As with any learned skill, practice makes a difference.

Again, there is a lot of good advice in this article as it relates to the need for more inclusive designs that minimize unnecessary cognitive load for users. However, a key point that is missing from that advice is the need to get feedback on designs from actual people who are blind. The way a blind user of VoiceOver interacts with his or her iOS device will often be a lot different from the way a developer just becoming familiar with the feature will do so (same goes for a usability expert).

What’s New in iOS 9 for Accessibility

With iOS 9, Apple continues to refine the user experience for those who have disabilities or just need additional supports to effectively interact with their iPhones and iPads. While there are only two new accessibility features in iOS 9 (Touch Accommodations and a new Keyboard pane for improved support of external Bluetooth keyboards), the existing features have received a number of enhancements. Probably the one that received the most attention in this update is Switch Control, which now includes a new scanning style, the ability to set separate actions for long presses, and Recipes for more easily performing repetitive actions such as turning the pages in a book in iBooks.

The first change you will notice when you go into the Accessibility pane in Settings is that things have been moved around just a bit. Really the only change is that the options for Interaction now follow those for Vision. Everything else then follows the same order as before. I like this change as I think both VoiceOver and Switch Control significantly change how the user interacts with the device and  this change should make it easier to navigate to Switch Control in the Accessibility pane. The change also works to highlight the new Touch Accommodations feature by placing it near the top of the Accessibility pane.

This post is a short summary of each accessibility feature that is either brand new or enhanced in iOS 9, starting with the new Touch Accommodations feature.

Touch Accommodations

This brand new feature is largely targeted at people with motor difficulties who may have problems with the accuracy of their touches as they interact with the touchscreen on an iOS device. Touch Accommodations consists of three options: Hold Duration, Ignore Repeat and Touch Assistance. Before you start experimenting with these options, I would recommend setting up your Accessibility Shortcut so that Touch Accommodations is the only option listed. This way if you get stuck while using Touch Accommodations you can quickly triple-click the Home button on your device to exit out of the feature.

Hold Duration will require the user to touch the screen for a given duration before a touch is recognized. This can be helpful for someone who struggles with accidental presses. When Hold Duration is turned on, touching the screen will display a visual cue with a countdown timer. If the user lifts the finger before the countdown runs out, the touch is not recognized. With Ignore Repeat, multiple touches within the specified duration are treated as a single touch. This can be specially helpful when typing with the onscreen keyboard. A user with a tremor may end up tapping repeatedly on the same spot, resulting in many unwanted keypresses.

Tap Assistance can be set to use the Initial Touch Location or the Final Touch Location.  The two options determine the spot on the screen where the touch is performed when you let go with your finger. With Initial Touch Location, you can tap and then move your finger around on the screen while a timer is displayed. If you let go with your finger during the countdown (which you can customize using the Tap Assistance Gesture Delay controls) the tap is performed where you first touched the screen. After the countdown expires, you can perform a gesture (a flick, swipe and so on) the way you are used to with iOS. With Final Touch Location, the touch is performed at the spot where you let go as long as you do it within the countdown time. This can be a different spot than where you first touched the screen.

Additions to Switch Control

Switch Control is an iOS feature introduced in iOS 7 that provides access to touchscreen devices for a number of people who rely on external assistive devices. My friend Christopher Hills, with whom I am co-authoring a book on this feature (stay tuned on that front),  is a good example of an expert user of Switch Control. Christopher has cerebral palsy and uses external switches to perform many of the gestures someone with typical motor functioning could do with their fingers on the touchscreen.

In iOS 9, Apple has continued the development of Switch Control with a number of new features:

  • A new Single Switch Step Scanning style: this new style requires the switch source to be continuously pressed until the user gets to the desired item. Letting go of the switch then will highlight that item and give it focus. With the default tap behavior, the next tap will bring up the scanner menu then within the scanner menu letting go of the switch will immediately select the option that has focus. A Dwell Time timing option determines how long it will take before an item is highlighted and the user can make a selection.
  • A new Tap Behavior: the Always Tap option is similar to Auto Tap in that it allows the user to make a selection with the first tap of the switch. However, with Always Tap, the scanner menu is available from an icon at the end of the scanning sequence instead of through a double-tap of the switch.
  • A Long Press action: the user an specified a separate action that can be performed when the switch is held down for a specified duration. This is a great way to exit out of the Recipes feature.
  • Recipes: the user can invoke a special mode for Switch Control where each press of the switch can perform the same action. A couple of actions are already included, such as tapping the middle of the screen or turning the pages in a book. These are primarily intended for use in iBooks. Creating a new recipe is as easy as giving it a name, assigning the switch that will be used to perform the action that will be repeated with each press, and choosing one of the built in actions or creating a custom one. Custom actions for Recipes can include a series of gestures and their timings. To exit out of the Recipe, the user has two options: setting a timeout after which the recipe will be ended if no switch presses take place, or setting the action for a long press of the switch to Exit Recipe.

A new option allows the switch user to combine tap behaviors when using the onscreen keyboard. With the Always Tap Keyboard Keys option, the keys will be selected with a single press of the switch even if the tap behavior is set to the default of showing the scanner menu at the first tap of the switch.


Customizable AssistiveTouch Menu

The layout of the AssistiveTouch menu can now be customized, with options for changing the number of items that appear on the top level shown and swapping out icons for features on secondary menus that are used more often. The number of icons on the top level menu can be set to as few as one and as many as eight. Tapping on any of the icons in the Customize Top Level Menu pane will open a list of all of the features supported by AssistiveTouch. Selecting an item from the list will move that option to the top level menu. Change your mind? No problem, a Reset option is available (in fact, I would love to see similar Reset options for other features such as VoiceOver and Switch Control).

Better Support for Bluetooth Keyboards

Under Interaction, you will find a new Keyboard option. Tapping that option will open a separate pane with options intended for those who use an external Bluetooth keyboard with their iOS devices:

  • Key Repeat: turns off the key repeat (it is enabled by default) in order to prevent multiple characters from being entered when a key is held down on the keyboard. The options for customizing this feature include adjustments for the delay before a key that is held down starts repeating, as well as how quickly the key repeat will take place.
  • Sticky Keys: allows the user to press the modifier keys for a keyboard shortcut in sequence rather than having to hold them down all at once. The options for this feature include a quick way to turn it on by pressing the Shift key quickly five times, as well as playing a sound to alert the user when it has been turned on.
  • Slow keys: changes how long the user has to hold down a key before it is recognized as a keypress (essentially a hold duration). The only option for this feature is to adjust the length the key has to be pressed before it is recognized.

The one option for the onscreen keyboard in the Keyboard pane addresses a usability problem by making the switch between lower case and upper case more prominent. By default, the keys on the onscreen keyboard are in lower case and only switch to uppercase when the shift key is pressed.

Tweaks to VoiceOver and Zoom

The Rotor in iOS 9 has two new options available: Text Selection and Typing Mode. The former is not a new feature or input mode, it just now can be changed through the rotor. With the latter, the user can more easily select text by character, word, line, or page (or select all) by flicking up or down with one finger after selecting Text Selection in the Rotor. A flick to the right will then select the text by the chosen granularity (word, line, etc.).

A new option allows the users of external Bluetooth keyboards to change the VoiceOver keys from Control + Option to the Caps Lock. Finally, users can now adjust the Double-tap Timeout at the bottom of the VoiceOver settings pane. This feature may be helpful to a VoiceOver user who also has motor difficulties and can’t perform the double-tap as quickly.

For Zoom, the only change is that the option for choosing different Zoom Filters is now available from the Zoom settings panel where before it could only be selected from the Zoom menu available after tapping the controller or the handle on the Zoom window.

Other Options

iOS 9 includes options for disabling the Shake to Undo feature as well as all system vibrations, both of which can be found under Interaction in the Accessibility pane.

As is often the case with iOS updates, a number of features that are not explicitly labeled as a accessibility features can benefit those who use assistive technologies. One example is the new Siri suggestions feature, which can be displayed with a swipe to the right from the Home screen. The suggestions include frequently contacted people, recently used apps, locations and more. Anything that puts less distance between users of VoiceOver and Switch Control and the information they need is a good thing in my book.

That’s it for this high level overview of the major (and some minor) changes in iOS 9 that impact those who rely on the accessibility features. I hope you have found it helpful.

Accessibility Options in Voice Dream Writer App

This week, Winston Chen and the Voice Dream team released a new Voice Dream Writer app,. I am highlighting the new app here not only because Voice Dream Reader is one of my favorite apps for students who need reading supports such as text to speech, word highlighting and customized text, but also for the attention to accessibility from the Voice Dream team in this new app. Not only are the controls and the interface in the app nicely labeled for VoiceOver users, but there are even a few features specially designed to make things easier for VoiceOver users.

Screenshot of Voice Dream Writer interface on iPad with VoiceOver controls highlighted.

When VoiceOver is turned on the app can recognize this and adds three buttons for editing text to the interface (they appear in the toolbar located just above the onscreen keyboard, on the left side). These buttons are:

  • Cursor:  allows the user to move the cursor by flicking up or down with one finger.
  • Cursor movement unit: changes how the cursor movement takes place by allowing the user to choose from characters, words or sentences.
  • Select text: selects text based on the cursor movement unit. For example, flicking up with sentences as the cursor movement unit will select the text one sentence at a time.

All of these controls are adjustable. A flick up or down with one finger will change the value (for the cursor movement unit) or navigate to/select the next item (for the cursor and select text buttons).

A three-finger swipe gesture is also supported for cursor movement and selection: a three-finger swipe up will move the cursor to the beginning of the document and a three-finger swipe down to the end, and three-finger swipes up or down will select the text from the cursor position to the beginning or end of the document.

Another nice feature of the app is the way it makes it easy to find misspelled words by opening Tools in the upper right and choosing Find Misspelled Words. You can then flick down with one finger to navigate the misspelled words in your document. When you get to a word you want to fix you have two options: you can double-tap with one finger to edit it with the onscreen keyboard or you can swipe from the right with three fingers to use the Word Finder with a phonetic search. The phonetic search will bring up a list of words that closely match the one that is misspelled in your document.  You can then choose the correctly spelled word from the list and double-tap with one finger to make the correction.

I did a short video to demonstrate some of these options in the Voice Dream Writer app. I hope you find it helpful. For more information about the app, make sure to check out the Voice Dream website.

IOS 6 Accessibility Features Overview

At today’s World Wide Developer’s Conference (WWDC) Apple announced IOS 6 with a number of accessibility enhancements. I am not a developer (yet!) so I don’t have a copy of the OS to check out,  so this post is primarily about what I read on the Apple website and on social media. A few of these features (word highlighting for speak selection, dictionary enhancements, custom alerts)  were tucked away in a single slide Scott Forstall showed, with little additional information on the Apple website. So far, these are the big features announced today:

  • Guided Access: for children with autism, this feature will make it easier to stay on task. Guided Access enables a single app mode where the home button can be disabled, so an app is not closed by mistake. In addition, this feature will make it possible to disable touch in certain areas of an app’s interface (navigation, settings button, etc.). This feature could be used to remove some distractions, and to simplify the interface and make an app easier to learn and use for people with cognitive disabilities. Disabling an area of the interface is pretty easy: draw around it with a finger and it will figure out which controls you mean. I loved how Scott Forstall pointed out the other applications of this technology for museums and other education settings (testing), a great example of how inclusive design is for more than just people with disabilities.
  • VoiceOver integrated with AssistiveTouch: many people have multiple disabilities, and having this integration between two already excellent accessibility features will make it easier for these individuals to work with their computers by providing an option that addresses multiple needs at once. I work with a wounded veteran who is missing most of one hand, has limited use of the other, and is completely blind. I can’t wait to try out these features together with him.
  • VoiceOver integrated with Zoom: people with low vision have had to choose between Zoom and VoiceOver. With IOS 6, we won’t have to make that choice. We will have two features to help us make the most of the vision we have: zoom to magnify and VoiceOver to hear content read aloud and rest our vision.
  • VoiceOver integrated with Maps: The VoiceOver integration with Maps should provide another tool for providing even greater  independence for people who are blind, by making it easier for us to navigate our environment.
  • Siri’s ability to launch apps: this feature makes Siri even more useful for VoiceOver users, who now have two ways to open an app, using touch or with their voice.
  • Custom vibration patterns for alerts: brings the same feature that has been available on the iPhone for phone calls to other alerts. Great for keeping people with hearing disabilities informed of what’s happening on their devices (Twitter and Facebook notifications, etc.).
  • FaceTime over 3G: this will make video chat even more available to people with hearing disabilities.
  • New Made for iPhone hearing aids: Apple will work with hearing aid manufacturers to introduce new hearing aids with high-quality audio and long battery life.
  • Dictionary improvements: for those of us who work with English language learners, IOS 6 will support Spanish, French and German dictionaries. There will also be an option to create a personal dictionary in iCloud to store your own vocabulary words.
  • Word highlights in speak selection: the ability to highlight the words as they are spoken aloud by text to speech benefits many  students with learning disabilities. Speak selection (introduced in IOS 5) now has the same capabilities as many third party apps in IOS 6.

These are the big features that were announced, but there were some small touches that are just as important. One of these is the deep integration of Facebook into IOS. Facebook is one of those apps I love and hate at the same time. I love the amount of social integration it provides for me and other people with disabilities, but I hate how often the interface changes and how difficult it is to figure it out with VoiceOver each time an update takes place. My hope is that Apple’s excellent support for accessibility in built-in apps will extend to the new Facebook integration, providing a more accessible alternative to the Facebook app which will continue to support our social inclusion into mainstream society. You can even use Siri to post a Facebook update.

Aside from the new features I mentioned above, I believe the most important accessibility feature shown today is not a built-in feature or an app, but the entire app ecosystem. It is that app ecosystem that has resulted in apps such as AriadneGPS and Toca Boca, both featured in today’s keynote. The built-in features, while great,  can only go so far in meeting the diverse needs of people with disabilities, so apps are essential to ensure that accessibility is implemented in a way that is flexible and customized as much as possible to each person. My hope is that Apple’s focus on accessibility apps today will encourage even more developers to focus on this market.

Another great accessibility feature that often gets ignored is the ease with which IOS can be updated to take advantage of new features such as Guided Access and the new VoiceOver integration. As Scott Forstall showed on chart during the keynote, only about 7% of Android users have upgraded to version 4.0, compared to 80% for IOS 5. What that means is that almost every IOS user out there is taking advantage of AssistiveTouch and Speak Selection, but only a very small group of Android users are taking advantage of the accessibility features in the latest version of Android.

Big props to Apple for all the work they have done to include accessibility in their products, but more importantly for continuing to show people with disabilities in a positive light. I loved seeing a blind person in the last keynote video for Siri. At this keynote, Apple showed another  blind person “taking on an adventure” by navigating the woods near his house independently. As a person with a visual disability myself, I found that inspiring. I salute the team at Apple for continuing to make people with disabilities more visible to the mainstream tech world, and for continuing to support innovation through inclusive design (both internally and through its developer community).

VoiceOver language rotor in IOS 4

As a result of a Twitter conversation this past week, I learned (thanks to Pratik Patel) a neat new feature that has been added to VoiceOver for the iPod touch and iPhone with the release of IOS 4. When you go into the VoiceOver settings of these devices, you should find a new option: Language Rotor. The Language Rotor allows you to quickly change the language used by VoiceOver by turning an imaginary dial on the touchscreen. This feature has been available on some Mac laptops, where you can use the rotor gesture to navigate web pages by headings, links and the like. It was good to see that this gesture has been added for language selection in IOS 4. This should really benefit anyone who wants to use VoiceOver to read back a book in a different language with iBooks, or when you access a web page from overseas that is in a language other than English (I suppose language students would be helped out by this feature too).

By going into the VoiceOver preferences on an iPod touch or iPhone (Settings, General, Accessibility, VoiceOver) you can select Language Rotor and then choose the languages that will be available when you use the Language Rotor. There were 34 languages available on my device, and a nice touch is that for some languages you have some dialects available as well (Spanish from Mexico as opposed to Mexico, or French from Canada as opposed to France).

To use the Language Rotor, use the dial turning gesture on the iPod touch or iPhone touchscreen until you hear Language, then flick up and down to select from the languages you have selected to make available in the settings. Another nice touch is that there is a visual indicator as you turn the dial. This feature was added to help out sighted users when they work with people who have visual disabilities and use VoiceOver.

The Language Rotor should be available on the iPad when that device gets an update to IOS 4 in November.