I Am More Powerful Book Project and World Usability Day

The following blog post is cross-posted on the Red Jumper blog.

World Usability Day

Thursday, November 13th is World Usability Day. According to the World Usability Day website, WUD is:

A single day of events occurring around the world that brings together communities of professional, industrial, educational, citizen, and government groups for our common objective: to ensure that the services and products important to life are easier to access and simpler to use. It is about celebration and education – celebrating the strides we have made in creating usable products and educating the masses about how usability impacts our daily lives.

For me, usability and accessibility are personal. The small steps people take that make things like websites, documents and technology products  easier to use for people of all levels of ability have a big impact on my day to day life. Without usability and accessibility, it would not have been possible for me to complete my education or do the advocacy work I do today through this blog, my YouTube videos or my presentations.

I Am More Powerful Than You Think

To celebrate World Usability Day, a group of us are releasing a book with the title “I Am More Powerful Than You Think.” The idea behind the book is to show how technology empowers us as people of different levels of ability to pursue our dreams as students, teachers and world citizens.

There are a number of ways you can access the book:

  • you can download it from the iBookstore (this is the easiest way).
  • you can download a copy from Dropbox and open it in your Chrome web browser using the Readium app for Chrome to read the book on any device that can run that web browser, or
  • you can watch a YouTube preview which will auto-advance through each page and auto-play the embedded media. This is a great feature recently added to Book Creator. It is a great way to share the work broadly with the popular YouTube service and also a great way to collaborate. I used this feature to share drafts of the project with my collaborators as we went along.

Authoring the Book

To build the book, I used the Book Creator app from Red Jumper Studio. Why Book Creator? It is very easy to learn and use (great usability), includes features for making content accessible, and offers the flexibility we needed to tell our story in a way that models Universal Design for Learning principles. With UDL, information is provided in a variety of formats so that people can access it in the way that works best for them. Book Creator allowed us to each tell our stories of empowerment  in three different ways:

  • a text blurb that can read aloud with word highlighting, using the Speak Selection (text to speech) feature built into iOS devices. I tried to make sure the text was large enough (24px) for anyone with low vision to see.
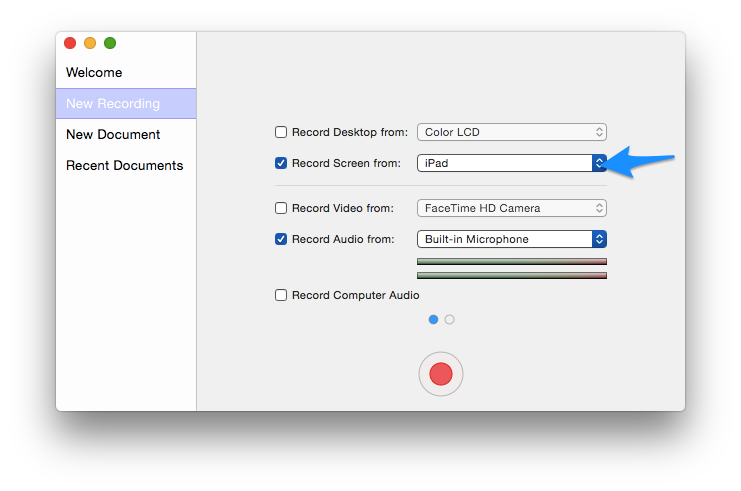
  • a sound recording of the same blurb. Book Creator makes it very easy to record audio by tapping the Add (+) button, choosing Add Sound and then recording right into the device. As an alternative, you can also add a recording from iTunes, which I did for a few of the sound clips which were emailed to me by the rest of our team.
  • video: video was really important for this project. Video connects with people in a way that other formats just can’t. It has an emotional impact that is important for working toward change. One tip I learned after contacting the Book Creator team is that you need to make sure to have the right format. If you import the video from the Camera roll as I did, it will be in the QuickTime (.mov) format and this will cause the book to be rejected when you submit it to the iBookstore (it will still work when you preview it in iBooks but if you want to share it widely I recommend uploading it to the iBookstore). It’s a simple fix: with the video selected, open the Inspector and choose Format > M4V. That will ensure your video is in the right format for the iBookstore.Changing the video format in Book Creator

The videos were actually how this idea first came to be. It all started with a series of tweets and emails after the release of Apple’s Powerful commercial for the iPhone, which ends with the phrase “I’m more powerful than you think.”  Not long after, Christopher Hills released his own More Powerful video and created the hashtag #iAmMorePowerfulThanYouThink on Twitter.

After that it was on. I created my own More Powerful video and asked other people in my personal learning network if they would like to contribute. We ended up with five beautiful videos covering a range of experiences from around the world:

  • I am a visually impaired photographer based in Florida and use my iOS devices for photography and creative expression.
  • Carrie is a special education teacher in Illinois and she uses technology to improve access to education for her students.
  • Christopher is in Australia and he’s a certified Final Cut Pro X video editor with his own video production business.
  • Daniela is in Spain and runs an accessibility consultancy.
  • Sady is a student at Full Sail University in Florida, but she lives in North Dakota and is able to pursue her cinematography degree online.Contributors to I Am More Powerful Than You Think

We are diverse in terms of age, gender, geographic location and how we use technology, but we are united by a common mission: to show the world that technology can make a difference in people’s lives when it includes accessibility from the start.

For each person, there is also a page that documents our online presence using the Hyperlink feature in Book Creator. You can visit our websites, follow us on Twitter, view our YouTube videos and Instagram photos and more. This was important because the many places we post in and participate online are a big part of our stories as well. They build a narrative of what we do and how we do it that is important to understanding the impact of technology in our lives.

Accessibility Options

A nice picture accompanies the contact information and it includes an accessibility description that can be read aloud by VoiceOver to someone who is blind. The team at Red Jumper included was great to include this feature in Book Creator to make the books authored with it more accessible to those who use a screen reader. It is important that accessibility be included not just in the app used to create the books (as it is with Book Creator) but in the content that app outputs. With the accessibility descriptions, we can ensure that’s the case. You can learn how to add an accessibility description in Book Creator by watching this tutorial on my YouTube channel.

Get Involved

We don’t want this book to be the end of this conversation. If you have a story of how technology makes you or someone you work with more powerful, we would love to hear it. Drop me a line or post a link to your story on Twitter with the hashtag #iAmMorePowerfulThanYouThink so we can find it.

The best way to share your story is to use Book Creator to build a few pages according to the template in our book. A nice feature of Book Creator is that you can email a book to another person who can collect several submissions and combine them into one book on one device. This feature makes it very easy to collaborate on global projects like this one. Along with the fact that you can use the app on both iOS and Android, this made it a great choice for us to quickly and easily publish this project. A big thanks to the Red Jumper team for continuing to build on the accessibility and usability of this great app.

Two New Options for Recording Your iPad Screen

When recording my iOS tutorials my setup has consisted of mirroring my iPad to my Mac with the Reflector app, then using the Screenflow app to record the mirrored iPad display. For audio I use a Blue Snowflake mic. This setup works well and I get the added benefit of an iPad frame around the mirrored display for a nice aesthetic.

With Yosemite, I have two more options for recording my iPad screen. First, I can select the iPad as a camera source in QuickTime Player. To create a new recording of your iPad screen with QuickTime:

  1. Make sure you have your iPad connected to your Mac with a Lightning cable.
  2. Launch QuickTime Player.
  3. Select File > New Movie Recording.
  4. Select your iPad as the camera from the pulldown menu to the right of the Record button.
    iPad selected as camera source in QuickTime Player.
  5. Perform the actions you wish to record on the iPad.
  6. Press Stop in QuickTime Player on your Mac.
  7. Choose File > Export and select your desired resolution. Another option is to choose File > Share (or the Share icon to the right of the QuickTime controls) to upload your iPad recording directly to a site such as YouTube or Vimeo.

This workflow will work well in situations where you are not able to use AirPlay to connect to Reflector or another mirroring app (I also use Air Server on occasion).

With the release of Screenflow 5, TeleStream has built on this support for recording the iPad screen in Yosemite. As with QuickTime Player, you can now choose the iPad as a camera source when configuring a new Screenflow recording session.
iPad selected as camera source in Screenflow new recording pane.
Screenflow adds a nice touch (literally): you can add touch callouts that show many of the iOS gestures (taps, swipes, zoom gestures) at specific points in your video recording. This is helpful for pointing out where a user should tap or perform a gesture while you demo apps and built-in features on the iPad.
Touch callouts menu in Screenflow.

Along with the other editing features included with Screenflow ($99 or $34 to upgrade from a previous version) I think this makes it the ideal solution for those who need to record the iPad screen on a regular basis (educators, app developers who need to demo new apps, or anyone with a passion for teaching on a public forum like YouTube or Vimeo).


A Visually Impaired Photographer Experiments with the GoPro

As many of you who follow me online know, I am very passionate about photography and the possibilities it presents to us as people with disabilities to tell our own stories and exercise our creativity. I love to use my iPhone to take photos because it incorporates so many accessibility features that help me with my photography, such as Zoom, VoiceOver and Invert Colors. However, I am always looking for new options to expand my photographic horizons and the Go Pro action camera is one such option that has fascinated me for some time. I believe that just because you have a disability it doesn’t mean you should not be able to ski, sky dive, or do anything else you set your mind to doing, and the Go Pro has become the go-to camera when it comes to action sports and an active lifestyle.

I started out with the  least expensive option in the GoPro lineup, the new entry-level Hero which retails for $129.  However, after about a week with the camera, I returned it and opted for the older Hero 3 white model, which is think is a better fit for my needs. The new entry-level Hero has a number of shortcomings due to its low price and limited feature set. However, if you’re an educator looking for an inexpensive camera for recording classroom activities (science experiments, plays and performances, etc) this is a nice camera and there are ways to get around its limitations:

  • it does not have an LCD screen for framing shots and adjusting camera settings like the more expensive Go Pro 4 Silver. I don’t think this is  a significant drawback, since use of  the LCD screen outdoors would be difficult anyway due to glare. The camera’s wide field of view makes it likely that you will capture the shot you want even when you can’t frame it with a viewfinder. For someone who has tunnel vision, the wide FOV is actually one of the things that made the Go Pro so attractive to me. Go Pro does sell an add-on LCD screen but I’m not sure if it is supported on the new Hero. Regardless, using the add-on screen will probably lead to reduced battery life.
  • it does not support Wifi connectivity. With other Go Pro cameras (like the Hero 3 White I eventually traded up to), you can set up a Wifi connection between the camera and a smartphone to control the camera and see what you are capturing. However, as with the addition of an add-on LCD screen, a drawback to Wifi connectivity is that it drains the battery much faster.
  • it has a built-in battery that cannot be replaced or swapped out to extend the length of time the camera can be used in the field.  A workaround for this is to use any of a number of smartphone or tablet external batteries that matches the needs of the Go Pro (5V and 1-1.5 amps). The external battery will allow you to capture longer time lapse photos where the camera has to be turned on for extended periods of time. I was also fortunate to find an old power adapter for a Kodak zi8 camera that  allows me to plug in the Go Pro to a wall outlet to charge it much faster than through the USB port on a computer.
  • it does not support the higher resolutions of more expensive Go Pro cameras. The Hero tops out at 1080p (30 fps)  and also supports 720p at 30 or 60 fps. It does not support 4K, which is fine by me as the higher resolutions result in huge files I can’t possibly store or process on my Macbook Air.

Despite its limitations, I still think the new Go Pro Hero is a  nice entry level camera for use in educational settings. It provides access to the many possibilities for using this type of camera to support learning (examples of which are featured on this website by Lisa Tossey) but at a very reasonable price. However, from an accessibility perspective, the biggest problem is not the lack of an LCD viewfinder with features such as large text or a high contrast mode. Rather it is the fact that there is not an option to set up spoken feedback other than a series of beeps as you advance through the various menu screens which are displayed in a small window on the front of the camera. If the camera had Wifi connectivity I could probably use VoiceOver and other accessibility features on my iPhone to get better access to the camera menus and settings.

This possibility convinced me to exchange the Hero for the older Hero 3 White, which does support Wifi. I was able to download the free Go Pro app from the App Store and it has some VoiceOver compatibility.  I’m convinced that with a few tweaks this app could be made very accessible to the blind. For the most part the  buttons have VoiceOver labels that can be spoken aloud to a blind user, but these labels could be improved so that they are clearer and easier to understand when read aloud.  For example, I don’t need to hear the following when I choose the option for reviewing the clips on my camera: GoPro app, list view icon, cam roll. Just describing it as Camera Roll would be sufficient. Surprisingly, the shutter release button is the only button or control with no label at all (it just says “button”). In any case, through the Wifi connection I will still be able to use Zoom and other accessibility features on my iPhone even if the app does not have great VoiceOver support.

With the Hero 3 White I lose the following  features which are only available in the current generation cameras: Quick Capture, Super Wide Capture and Auto Low Light. Quick Capture allows the capture of video with a single tap of the top button and time lapse with an extended press, while Super Wide extends the FOV slightly and Auto Low Light gives the camera better dynamic range in low light situations. Of these three features only Super Wide would be significantly helpful to me. I don’t shoot in the kinds of environments where Auto Low Light would come in handy (due to my difficulties with navigating low-light environments) and Quick Capture is a nice-to-have but not an essential feature.

The Hero 3 White also has a slightly lower top frame rate for photos, topping out at 3fps as compared to 5fps for the new Hero, as well as a smaller capacity battery.  However, I can compensate for the smaller capacity battery by purchasing a number of inexpensive add-on batteries (retailing for $15-20 each) which the Hero 3 White supports but the new Hero does not. The swappable batteries would make up somewhat for the battery drain resulting from the use of the camera with a Wifi connection to my iPhone for accessibility support.

Along with the Wifi connectivity, the Hero 3 White also has support for an HDMI port (for connecting the camera to a HD TV), the ability to connect an external microphone for improved audio (using an adapter), support for  higher capacity memory cards (topping out at 64GB as opposed to 32GB with the new Hero) and again,  swappable batteries. The Hero 3 White has more customizable time-lapse settings, allowing for intervals from half a second to a full 60 seconds. The new Hero on the other hand is set to a single interval of half a second. Both cameras are very similar in terms of mounting options and underwater performance (with a top depth of 131 feet in each case).

I have had great fun with the  Go Pro cameras during the short time I have owned them, and I really think the Hero 3 White will be a better action camera for me than the entry-level Hero (at least until I can get one of the higher priced models like the Go Pro 4 Silver). I end this post with this photo I took with my new GoPro during a recent visit to the beach.

Go Pro selfie taken at the beach in St. Petersburg, Florida.


iBeacons Experiment with Beacondo

As detailed in a blog post on AT Mac, iBeacon is a new technology that has a lot of potential for people with disabilities. iBeacons are small devices capable of emitting a low-power Bluetooth signal that can be recognized by an iOS device and used to trigger an action such as opening a website, playing a video or sound and more. One use case that is already in implementation is the use of iBeacons to provide environmental cues that help people who are blind navigate the environment in an airport or  other place of public accommodation.

I had been curious about iBeacons for a while, and even purchased a single iBeacon from Radius Networks to try the new technology out. The one I got was only $29 and it works while plugged into a USB port for power. Other iBeacons have their own battery and don’t have to be plugged in, providing more flexibility of installation. In the future, I will probably buy the $99 3-pack from Estimote for this reason.

In preparation for a session at Closing the Gap focusing on how Augmented Reality and iBeacons can be used to provide UDL supports, I finally took the plunge and started experimenting with my new iBeacon. I created a simple content delivery app using the Beacondo software which is available as a free download along with an SDK. I followed along with the tutorials on the Beacondo site and a couple of hours later I had a working iBeacon app inspired by a similar one I saw demoed at this year’s Apple Distinguished Educator Institute in San Diego. At Closing the Gap, I will use this app to introduce iBeacons to the participants as they walk around the room and learn what an iBeacon is, the different types of  iBeacons available for purchase, and how they are being implemented in education (with links to the websites of my ADE colleagues Paul Hamilton and Jonathan Nalder, who are the true experts in this area).

I couldn’t believe how easy it was to create the app with Beacondo. I just followed these steps:

  • Downloaded the free Xcode software from Apple.
  • Downloaded the Beacondo Designer software and the SDK.
  • After watching the tutorials, opened Beacondo and got started customizing the various screens in the template included with the SDK. I had to include any videos and images I wanted in the app inside my project directory so that they would be available in the various pulldown menus inside Beacondo Designer.
  • Clicked on Build and chose Xcode to preview the app using the iPhone simulator.
  • Rinsed and repeated as needed to get my content looking the way I wanted.
  • When I had the app looking just the way I wanted it was time to add the iBeacon and assign an action as demonstrated in this video.
  • Did a final build for Beacondo Viewer, an iOS app that allows you to open your app for testing on your device. Building for Beacondo Viewer exports the app as a zip file that can be easily shared online.
  • Uploaded the app as a zip file to Dropbox and created a QR code using Kaywa QR Generator, my favorite tool for creating QR codes.
  • Opened Beacondo Viewer and chose the Scan from QR Code option, then scanned the QR code I had created earlier.

The first few times I did this I could not get the app to open in Beacondo Viewer. A quick email to Beacondo and they informed me that I had to change the ending to my Dropbox link from “dl=0” to “dl=1.” Beacondo will not be able to download the app’s zip file if it encounters a “Download now” screen and changing the end of the URL gets around that. With that small change I was able to download the app to Beacondo Viewer and the next time I walked into my room I was greeted with an audio message I had recorded and the app opened up directly to a page explaining what an iBeacon is, just as I would want it to do for participants at our Closing the Gap session.

From a UDL perspective, iBeacons could be really useful for embedding instructions and other context-aware supports that are available to learners when and where they are needed. Paul Hamilton does a nice demonstration of how he is using iBeacons to create learning centers in his classroom. iBeacons would be a great way to embed virtual coaches in these learning centers or stations to aid students with autism or executive functioning difficulties (think visual schedules, social stories and other supports that are triggered only when the user is at the location where these supports would be useful). I am also interested in the use of QR Codes, Augmented Reality and iBeacons to create layered learning environments where users have multiple pathways through the content, triggering on-demand access to background information or more advanced topics  as they see fit.


Ten Chrome Extensions for Accessibility and Universal Design for Learning

Although I am primarily a Safari user, I have been very impressed with the variety of extensions you can add to customize the Chrome web browser from Google. I have been experimenting with a number of these extensions, and here are the ones I have found helpful and currently have installed:

  • ChromeVox: Google’s screen reader that is built into Chrome OS on Chromebooks or can be installed as an extension for the Chrome browser on Windows or Mac. A really nice interactive tutorial is available from Google to help new users get started with ChromeVox.
  • ChromeSpeak: This extension provides the same functionality that is available through a Speech service on the Mac but should be helpful to  Chrome OS users. You can select text on any web page, right-click and choose Speak to have the text read aloud using the text to speech engine built into the respective OS.
  • ChromeVis: This extension for low vision users allows you to select text and press a keyboard shortcut ( the number 0) to have the text appear magnified in a small window. You can customize this window (or lens) to have the text rendered in different color combinations, to change the text size, or to have the magnified text appear right next to the selection rather than at the top of the page. Navigation is performed through a series of keyboard shortcuts.
  • High Contrast: This extension allows you to add a high contrast theme on a  site by site basis. Options include:  high contrast, grayscale,  inverted, inverted grayscale and yellow on black.
  • Zoom :  This extension gives you more control over how Zoom works in your Chrome browser. You can use a slider or type in a value to set a custom zoom level.
  • Readability and Clearly: Both of these extensions will clean up the clutter on a  web page and present a simplified version that is perfect for using text to speech and reading without all of the distractions of ads and other irrelevant content. Both extensions provide options for customizing the appearance of the text (text size, background, etc.). With Clearly, you can also highlight right on the page and if you sign into your Evernote account these highlights will be saved into Evernote automatically.
  • Read&Write for Google: Read&Write is a premium extension for Chrome from TextHelp. It provides a number of supports that are helpful to students with learning difficulties such as dyslexia: text to speech with word highlighting, ability to highlight right on the page using a number of colors, a picture dictionary to make concepts more concrete, and an option for summarizing a page. A 30 day free trial is available, but even after the trial is over some of the features will continue to work. This includes the text to speech with word highlighting and the translation features.
  • Evernote Web Clipper and Diigo Web Collector:  Both of these extensions are great as supports for classroom research and reading.  With Evernote Web Clipper, you can save an entire web page to your Evernote account, or you can choose to clip a selection, take a screenshot, or just save a bookmark to the page. An option to save a simplified version is also available. This will save the current page without the ads and other distractions.  For a screenshot, you can add text annotations and stamps (great for highlighting critical features in diagrams, charts and other graphics).  Diigo does a lot of the same things as Evernote Web Clipper: you can save bookmarks to pages or screenshots with annotations. What I really like about Diigo is the ability to add highlights and sticky notes to any web page. This has made it my tool of choice for taking notes while I am doing research online.

Bonus: ChromeCast. This extension allows you to show any Chrome tab on your TV using the Chromecast HDMI dongle available from Google. This can be useful for showing websites and documents from Google Docs on a larger screen.

There are a number of extensions that I use for testing web pages for accessibility as well, including:

  • Web Developer Toolbar adds a number of handy tools for checking accessibility, such as options for disabling styles, displaying alt text for images and more.
  • Accessibility Developer Tools from Google adds an accessibility audit section to the Chrome Developer tools.
  • Color Contrast Checker can help you check an entire page or a portion of it for compliance with WCAG 2.0 requirements for color contrast.

New iTunes U Course on UDL and iOS Devices

I recently published a course on iTunes U called nABLEing All Learners with iOS Devices. The course is organized according to the nABLE framework or heuristic I use to help me with technology integration. In designing the course I have tried to incorporate a number of UDL principles as a model:

  • Multiple pathways (UDL Checkpoint 8.2: Vary demands and resources to optimize challenge). Throughout the course there are “Dig Deeper” post that encourage learners to explore a given topic in more depth. This gives the learner some choice: skip these Dig Deeper posts and go through the course at a basic level designed to provide the most essential content; or follow the links and other resources available in these posts to go through the course at a more advanced level. The choice is there for the learner.
  • Accessible Materials (UDL Guidelines 1 and 2): I have paid attention to this guideline in a number of ways: all of the videos I have authored include closed captions (and soon I will be uploading transcripts as well). With the ebooks and other documents, I have paid attention to accessibility by adding tags for screen readers in the case of PDF and by including options such as accessibility descriptions in the case of ePub. For third-party content, I have tried to choose accessible content as much as possible (the resources from CAST are great in this respect).
  • Prompts for reflection and discussion: Throughout the course, I have made use of the new Discussions feature of iTunes U to prompt learners to reflect on their learning. I am going to keep these discussions, but I think in the future I will add some activities with apps (apptivities if you will) to make the learning even more concrete.

I invite you to visit the course and enroll if you are interested in learning more about UDL and how to support its implementation with the wonderful accessibility features available on iOS.

You’re More Powerful Than You Think

As I watched the Apple commercial “Powerful” one night I got an idea: what if there were a series of commercials with the same theme but focusing on how Apple technology has empowered me and many others who have disabilities to pursue their dreams and “be powerful” in our own way.

I initially threw this idea out on Facebook and a few weeks later, Christopher Hills posted a great video of iOS 8 Switch Control that featured this theme in the intro. I loved the way Christopher presented the idea and this inspired me to create my own video.

I went down to the waterfront in St. Petersburg, Florida (where I live) to watch the sunrise on a Sunday morning. Unfortunately, it had been raining most of the weekend and the view of the sunrise was not that great. That gave me an idea: let’s not waste the trip, let’s make a quick video. Armed with my iPhone, I recorded a series of 4-5 clips while the light was still good. I then used iMovie right on the phone to edit the clips into a short video that is about the length of a typical commercial. Here is the result:

Do you know anyone else whose story demonstrates how they are “more powerful” with technology? Post it online and then use the hashtag Christopher created: #iAmMorePowerfulThanYouThink

Third Party Keyboards

One of the most anticipated features in iOS 8 was the redesigned on-screen keyboard. Recently, I did a video on my YouTube channel on the new QuickType feature that now provides smart word prediction with the iOS onscreen keyboard. That video also discussed two other additions: the Dictation feature now has almost real-time feedback, and you can customize the on-screen keyboard by adding a number of third-party keyboards to your iOS device. In the video I featured two of my favorite third-party keyboards: Swype and Fleksy (both $.99 on the App Store).

With Fleksy,  I like the extra feedback I get as I type (the letters appear to jump out) and the fact that you can customize the keyboard by choosing large keys and adjusting the colors to a combination that works well for you. Typing is also very quick with this keyboard. Whenever you need to enter a space, just do a quick swipe to the right, and deleting is as simple as a quick swipe to the left. Word prediction is included, but I have not found the suggestions to be as good as with the built-in keyboard.

Swype allows me to type very quickly by dragging my fingers over the letters that make up each word in one continuous motion.  It really makes more sense when you see it in action in the video. While you can switch to a Dark theme that I find helpful, I wish this keyboard had a few more themes to choose from.

Lastly, that brings me to Keedogo and Keedogo Plus from AssistiveWare, a well known name in the field of assistive technology thanks to their Proloquo2Go app. Keedogo is designed for beginning writers, with a simplified layout, lower-case letters, ability to use either a QWERTY or ABC layout, and vowel and special key highlighting. It does not include features that could distract an early writer, such as word prediction and auto-correction. I also like the high contrast and large keys. Keedogo Plus adds word prediction and automatic capitalization to the feature set, and is intended for beginning writers who are ready to move on from Keedogo to something more advanced.

AssistiveWare has a third keyboard called Keeble in development that is intended for people with vision and motor difficulties. This keyboard will include options such as color themes, Speak Keys for auditory feedback as you type, select on release, and more.

One quick tip before I end: apparently there is a bug that creates problems with the third party keyboards when Guided Access is enabled. If you are having problems such as the keyboards disappearing, head on over to Settings > Accessibility > Guided Access (found under Learning) and turn that feature off if you are not using it.

Recording Setups for iPad

While the iPad has a nice microphone that records decent quality audio, I have been wanting to explore the possibility of getting even better audio using some of the external microphones I already own, such as the Snowball from Blue. The Snowball works great with Garageband for iOS, provided you have the proper adapters to connect the mic to the iPad. In order to connect the mic to my iPad mini with Retina display I needed an Apple Camera Connection Kit as well as a Lighting to 30-pin adapter. Both of these I already owned, but if you don’t have them already they can be purchased at any Apple store. Some electronics stores such as Best Buy also carry them.

When you launch Garageband with the Snowball plugged in and select the Audio Recorder as your instrument, Garageband will actually let you know if you are using the external USB mic to record (just look in the text box to the right of the VU meter.

As much as I love the Snowball, I wanted to have a more portable solution that I could take with me if I wanted to record while on the road. After doing some research online, I think I found a really nice setup consisting of the following parts that I purchased on Amazon:

The IK iRig PRE is the key to the setup. It provides power to the XLR microphone by way of a 9 volt battery and connects to the iPad through the headphone jack. I can then connect my headphones to the iRig PRE if I want to be able to listen in while I record.

This setup also works well if you are blind and want to create recordings with Garageband while using VoiceOver, as you can hear the VoiceOver speech with your headphones and still use the microphone to record. Garageband has excellent support for VoiceOver and it allows recordings to be posted directly to SoundCloud from within the app. I created the following recordings to show the difference in quality between the three different options for recording: built-in mic, Blue Snowball, and Behringer mic connected with iRig PRE. All of the recordings were made using VoiceOver and Garageband on the iPad.

First, the built-in microphone on the iPad:

Next we have the Blue Snowball connected to the iPad through a Camera Connection kit.

Finally, we have the Behringer XLR mic connected to the iPad with the iRig pre using the headphone jack.

To me, I think the Snowball sounded the best, but it is not very portable due to its weird shape and weight.


Quick Tip: Siri and Speak Screen

New in iOS 8, Speak Screen allows you to hear not only text but also interface elements such as buttons and other controls read aloud. Speak Screen is a handy feature to use on websites, ebooks and anywhere you need to have the text read aloud to you, or if you need to familiarize yourself with a layout of an app due to a vision difficulty.  The nice thing about this feature is that you don’t have to make a selection first. Speak Screen begins reading at the top of the page automatically after you activate it but you can use onscreen controls to advance the selection or to rewind, and you can also adjust the speaking speed. Also, Speak Screen will work with any of the voices you have installed on your device, including the advanced Alex voice Apple has now ported from the Mac to iOS with iOS 8.

Speak screen popover menu with options for navigation and controlling the speaking rate.

To activate Speak Screen, you use a special gesture (drag from the top of the screen with two fingers). Here is today’s quick tip: instead of using a gesture to start Speak Screen, use your voice. Siri works great for this purpose. Just bring up Siri and say “Speak Screen” and your device will start reading the current screen.

Even better, with iOS 8, you can put Siri in an always listening mode by going into Settings > Siri and enabling Hey Siri. You can then just say “Hey Siri” to start Siri (but remember that this only works when you have your device plugged in to a power source, as it drains the battery some). A great use of “Hey Siri” is to use it in combination with Speak Screen. Just say “Hey Siri, Speak Screen” and it should start reading the text and describing the onscreen controls.

I hope you find that tip useful.