A Visually Impaired Photographer Experiments with the GoPro

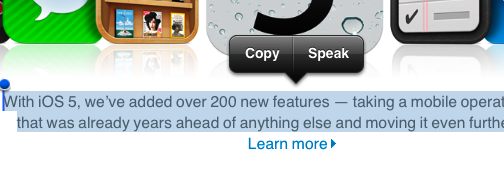
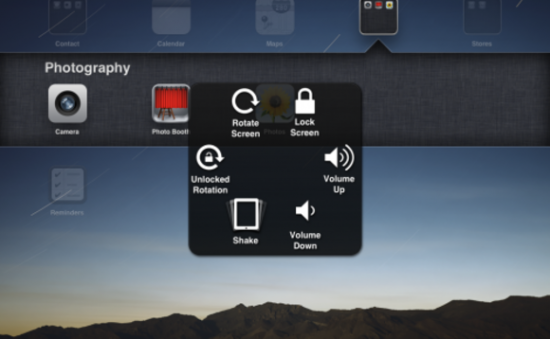
As many of you who follow me online know, I am very passionate about photography and the possibilities it presents to us as people with disabilities to tell our own stories and exercise our creativity. I love to use my iPhone to take photos because it incorporates so many accessibility features that help me with my photography, such as Zoom, VoiceOver and Invert Colors. However, I am always looking for new options to expand my photographic horizons and the Go Pro action camera is one such option that has fascinated me for some time. I believe that just because you have a disability it doesn’t mean you should not be able to ski, sky dive, or do anything else you set your mind to doing, and the Go Pro has become the go-to camera when it comes to action sports and an active lifestyle.

I started out with the  least expensive option in the GoPro lineup, the new entry-level Hero which retails for $129.  However, after about a week with the camera, I returned it and opted for the older Hero 3 white model, which is think is a better fit for my needs. The new entry-level Hero has a number of shortcomings due to its low price and limited feature set. However, if you’re an educator looking for an inexpensive camera for recording classroom activities (science experiments, plays and performances, etc) this is a nice camera and there are ways to get around its limitations:

  • it does not have an LCD screen for framing shots and adjusting camera settings like the more expensive Go Pro 4 Silver. I don’t think this is  a significant drawback, since use of  the LCD screen outdoors would be difficult anyway due to glare. The camera’s wide field of view makes it likely that you will capture the shot you want even when you can’t frame it with a viewfinder. For someone who has tunnel vision, the wide FOV is actually one of the things that made the Go Pro so attractive to me. Go Pro does sell an add-on LCD screen but I’m not sure if it is supported on the new Hero. Regardless, using the add-on screen will probably lead to reduced battery life.
  • it does not support Wifi connectivity. With other Go Pro cameras (like the Hero 3 White I eventually traded up to), you can set up a Wifi connection between the camera and a smartphone to control the camera and see what you are capturing. However, as with the addition of an add-on LCD screen, a drawback to Wifi connectivity is that it drains the battery much faster.
  • it has a built-in battery that cannot be replaced or swapped out to extend the length of time the camera can be used in the field.  A workaround for this is to use any of a number of smartphone or tablet external batteries that matches the needs of the Go Pro (5V and 1-1.5 amps). The external battery will allow you to capture longer time lapse photos where the camera has to be turned on for extended periods of time. I was also fortunate to find an old power adapter for a Kodak zi8 camera that  allows me to plug in the Go Pro to a wall outlet to charge it much faster than through the USB port on a computer.
  • it does not support the higher resolutions of more expensive Go Pro cameras. The Hero tops out at 1080p (30 fps)  and also supports 720p at 30 or 60 fps. It does not support 4K, which is fine by me as the higher resolutions result in huge files I can’t possibly store or process on my Macbook Air.

Despite its limitations, I still think the new Go Pro Hero is a  nice entry level camera for use in educational settings. It provides access to the many possibilities for using this type of camera to support learning (examples of which are featured on this website by Lisa Tossey) but at a very reasonable price. However, from an accessibility perspective, the biggest problem is not the lack of an LCD viewfinder with features such as large text or a high contrast mode. Rather it is the fact that there is not an option to set up spoken feedback other than a series of beeps as you advance through the various menu screens which are displayed in a small window on the front of the camera. If the camera had Wifi connectivity I could probably use VoiceOver and other accessibility features on my iPhone to get better access to the camera menus and settings.

This possibility convinced me to exchange the Hero for the older Hero 3 White, which does support Wifi. I was able to download the free Go Pro app from the App Store and it has some VoiceOver compatibility.  I’m convinced that with a few tweaks this app could be made very accessible to the blind. For the most part the  buttons have VoiceOver labels that can be spoken aloud to a blind user, but these labels could be improved so that they are clearer and easier to understand when read aloud.  For example, I don’t need to hear the following when I choose the option for reviewing the clips on my camera: GoPro app, list view icon, cam roll. Just describing it as Camera Roll would be sufficient. Surprisingly, the shutter release button is the only button or control with no label at all (it just says “button”). In any case, through the Wifi connection I will still be able to use Zoom and other accessibility features on my iPhone even if the app does not have great VoiceOver support.

With the Hero 3 White I lose the following  features which are only available in the current generation cameras: Quick Capture, Super Wide Capture and Auto Low Light. Quick Capture allows the capture of video with a single tap of the top button and time lapse with an extended press, while Super Wide extends the FOV slightly and Auto Low Light gives the camera better dynamic range in low light situations. Of these three features only Super Wide would be significantly helpful to me. I don’t shoot in the kinds of environments where Auto Low Light would come in handy (due to my difficulties with navigating low-light environments) and Quick Capture is a nice-to-have but not an essential feature.

The Hero 3 White also has a slightly lower top frame rate for photos, topping out at 3fps as compared to 5fps for the new Hero, as well as a smaller capacity battery.  However, I can compensate for the smaller capacity battery by purchasing a number of inexpensive add-on batteries (retailing for $15-20 each) which the Hero 3 White supports but the new Hero does not. The swappable batteries would make up somewhat for the battery drain resulting from the use of the camera with a Wifi connection to my iPhone for accessibility support.

Along with the Wifi connectivity, the Hero 3 White also has support for an HDMI port (for connecting the camera to a HD TV), the ability to connect an external microphone for improved audio (using an adapter), support for  higher capacity memory cards (topping out at 64GB as opposed to 32GB with the new Hero) and again,  swappable batteries. The Hero 3 White has more customizable time-lapse settings, allowing for intervals from half a second to a full 60 seconds. The new Hero on the other hand is set to a single interval of half a second. Both cameras are very similar in terms of mounting options and underwater performance (with a top depth of 131 feet in each case).

I have had great fun with the  Go Pro cameras during the short time I have owned them, and I really think the Hero 3 White will be a better action camera for me than the entry-level Hero (at least until I can get one of the higher priced models like the Go Pro 4 Silver). I end this post with this photo I took with my new GoPro during a recent visit to the beach.

Go Pro selfie taken at the beach in St. Petersburg, Florida.


iBeacons Experiment with Beacondo

As detailed in a blog post on AT Mac, iBeacon is a new technology that has a lot of potential for people with disabilities. iBeacons are small devices capable of emitting a low-power Bluetooth signal that can be recognized by an iOS device and used to trigger an action such as opening a website, playing a video or sound and more. One use case that is already in implementation is the use of iBeacons to provide environmental cues that help people who are blind navigate the environment in an airport or  other place of public accommodation.

I had been curious about iBeacons for a while, and even purchased a single iBeacon from Radius Networks to try the new technology out. The one I got was only $29 and it works while plugged into a USB port for power. Other iBeacons have their own battery and don’t have to be plugged in, providing more flexibility of installation. In the future, I will probably buy the $99 3-pack from Estimote for this reason.

In preparation for a session at Closing the Gap focusing on how Augmented Reality and iBeacons can be used to provide UDL supports, I finally took the plunge and started experimenting with my new iBeacon. I created a simple content delivery app using the Beacondo software which is available as a free download along with an SDK. I followed along with the tutorials on the Beacondo site and a couple of hours later I had a working iBeacon app inspired by a similar one I saw demoed at this year’s Apple Distinguished Educator Institute in San Diego. At Closing the Gap, I will use this app to introduce iBeacons to the participants as they walk around the room and learn what an iBeacon is, the different types of  iBeacons available for purchase, and how they are being implemented in education (with links to the websites of my ADE colleagues Paul Hamilton and Jonathan Nalder, who are the true experts in this area).

I couldn’t believe how easy it was to create the app with Beacondo. I just followed these steps:

  • Downloaded the free Xcode software from Apple.
  • Downloaded the Beacondo Designer software and the SDK.
  • After watching the tutorials, opened Beacondo and got started customizing the various screens in the template included with the SDK. I had to include any videos and images I wanted in the app inside my project directory so that they would be available in the various pulldown menus inside Beacondo Designer.
  • Clicked on Build and chose Xcode to preview the app using the iPhone simulator.
  • Rinsed and repeated as needed to get my content looking the way I wanted.
  • When I had the app looking just the way I wanted it was time to add the iBeacon and assign an action as demonstrated in this video.
  • Did a final build for Beacondo Viewer, an iOS app that allows you to open your app for testing on your device. Building for Beacondo Viewer exports the app as a zip file that can be easily shared online.
  • Uploaded the app as a zip file to Dropbox and created a QR code using Kaywa QR Generator, my favorite tool for creating QR codes.
  • Opened Beacondo Viewer and chose the Scan from QR Code option, then scanned the QR code I had created earlier.

The first few times I did this I could not get the app to open in Beacondo Viewer. A quick email to Beacondo and they informed me that I had to change the ending to my Dropbox link from “dl=0” to “dl=1.” Beacondo will not be able to download the app’s zip file if it encounters a “Download now” screen and changing the end of the URL gets around that. With that small change I was able to download the app to Beacondo Viewer and the next time I walked into my room I was greeted with an audio message I had recorded and the app opened up directly to a page explaining what an iBeacon is, just as I would want it to do for participants at our Closing the Gap session.

From a UDL perspective, iBeacons could be really useful for embedding instructions and other context-aware supports that are available to learners when and where they are needed. Paul Hamilton does a nice demonstration of how he is using iBeacons to create learning centers in his classroom. iBeacons would be a great way to embed virtual coaches in these learning centers or stations to aid students with autism or executive functioning difficulties (think visual schedules, social stories and other supports that are triggered only when the user is at the location where these supports would be useful). I am also interested in the use of QR Codes, Augmented Reality and iBeacons to create layered learning environments where users have multiple pathways through the content, triggering on-demand access to background information or more advanced topics  as they see fit.


Recording Setups for iPad

While the iPad has a nice microphone that records decent quality audio, I have been wanting to explore the possibility of getting even better audio using some of the external microphones I already own, such as the Snowball from Blue. The Snowball works great with Garageband for iOS, provided you have the proper adapters to connect the mic to the iPad. In order to connect the mic to my iPad mini with Retina display I needed an Apple Camera Connection Kit as well as a Lighting to 30-pin adapter. Both of these I already owned, but if you don’t have them already they can be purchased at any Apple store. Some electronics stores such as Best Buy also carry them.

When you launch Garageband with the Snowball plugged in and select the Audio Recorder as your instrument, Garageband will actually let you know if you are using the external USB mic to record (just look in the text box to the right of the VU meter.

As much as I love the Snowball, I wanted to have a more portable solution that I could take with me if I wanted to record while on the road. After doing some research online, I think I found a really nice setup consisting of the following parts that I purchased on Amazon:

The IK iRig PRE is the key to the setup. It provides power to the XLR microphone by way of a 9 volt battery and connects to the iPad through the headphone jack. I can then connect my headphones to the iRig PRE if I want to be able to listen in while I record.

This setup also works well if you are blind and want to create recordings with Garageband while using VoiceOver, as you can hear the VoiceOver speech with your headphones and still use the microphone to record. Garageband has excellent support for VoiceOver and it allows recordings to be posted directly to SoundCloud from within the app. I created the following recordings to show the difference in quality between the three different options for recording: built-in mic, Blue Snowball, and Behringer mic connected with iRig PRE. All of the recordings were made using VoiceOver and Garageband on the iPad.

First, the built-in microphone on the iPad:

Next we have the Blue Snowball connected to the iPad through a Camera Connection kit.

Finally, we have the Behringer XLR mic connected to the iPad with the iRig pre using the headphone jack.

To me, I think the Snowball sounded the best, but it is not very portable due to its weird shape and weight.


A SAMR and UDL Framework

As I was traveling to Macworld 2013, where I presented a session on iBooks Author, I had some time when I was trapped on a plane without Wi-Fi (the horror!). Rather than reading the magazine in front of me, I gave into my urge to try to combine two frameworks I am really passionate about, the SAMR model developed by Dr. Ruben Puentadura and the UDL framework developed by CAST. Below is an image showing the framework I developed and some apps that address each level. This was just a quick brainstorm on a long plane ride, but I do appreciate your feedback.

SAMRandUDL008.008 SAMRandUDL.009


Update: Here is a text version that should be more accessible with a screen reader (with app and feature matching):

n: needs assessment and profile
determine current level of performance and desired outcomes.

A: access to content and tools
The technology eliminates barriers that prevent access to information

  • Proloquo2Go
  • FaceTime
  • VoiceOver
  • AssistiveTouch
  • Closed Captioning Support
  • Dictation (built-in with iOS)
  • Dragon Dictation
B: building supports and scaffolds for learner variability
The technology includes scaffolds and supports that account for learner differences.
  • iBooks
  • AppWriter US
  • Speak It!
  • Typ-O HD
  • Evernote
  • Notability
L: leveraging multimedia
The technology provides multiple means of expression.
  • Book Creator
  • Creative Book Builder
  • StoryKit
  • SonicPics
  • StoryRobe
  • Pictello
E: expression and creativity
The technology unleashes creative potential and disrupts perceptions of disability.
  • Camera
  • iMovie
  • Garageband
  • iPhoto
  • Instagram

Why and how to caption?

The Collaborative for Communication Access via Captioning has created an excellent video showing how real people are impacted by the lack of captioning. The title of the video says it all: “Don’t Leave Me Out”.

Don’t Leave Me Out

If you are a Mac user, I have created a couple of videos on how to caption QuickTime movies  that are available from the Tech Ease 4 All website I worked on at the University of South Florida. I caption my videos with a $99 program called MovieCaptioner from Synchrimedia.

These videos are themselves closed captioned, of course.

IOS 6 Accessibility Features Overview

At today’s World Wide Developer’s Conference (WWDC) Apple announced IOS 6 with a number of accessibility enhancements. I am not a developer (yet!) so I don’t have a copy of the OS to check out,  so this post is primarily about what I read on the Apple website and on social media. A few of these features (word highlighting for speak selection, dictionary enhancements, custom alerts)  were tucked away in a single slide Scott Forstall showed, with little additional information on the Apple website. So far, these are the big features announced today:

  • Guided Access: for children with autism, this feature will make it easier to stay on task. Guided Access enables a single app mode where the home button can be disabled, so an app is not closed by mistake. In addition, this feature will make it possible to disable touch in certain areas of an app’s interface (navigation, settings button, etc.). This feature could be used to remove some distractions, and to simplify the interface and make an app easier to learn and use for people with cognitive disabilities. Disabling an area of the interface is pretty easy: draw around it with a finger and it will figure out which controls you mean. I loved how Scott Forstall pointed out the other applications of this technology for museums and other education settings (testing), a great example of how inclusive design is for more than just people with disabilities.
  • VoiceOver integrated with AssistiveTouch: many people have multiple disabilities, and having this integration between two already excellent accessibility features will make it easier for these individuals to work with their computers by providing an option that addresses multiple needs at once. I work with a wounded veteran who is missing most of one hand, has limited use of the other, and is completely blind. I can’t wait to try out these features together with him.
  • VoiceOver integrated with Zoom: people with low vision have had to choose between Zoom and VoiceOver. With IOS 6, we won’t have to make that choice. We will have two features to help us make the most of the vision we have: zoom to magnify and VoiceOver to hear content read aloud and rest our vision.
  • VoiceOver integrated with Maps: The VoiceOver integration with Maps should provide another tool for providing even greater  independence for people who are blind, by making it easier for us to navigate our environment.
  • Siri’s ability to launch apps: this feature makes Siri even more useful for VoiceOver users, who now have two ways to open an app, using touch or with their voice.
  • Custom vibration patterns for alerts: brings the same feature that has been available on the iPhone for phone calls to other alerts. Great for keeping people with hearing disabilities informed of what’s happening on their devices (Twitter and Facebook notifications, etc.).
  • FaceTime over 3G: this will make video chat even more available to people with hearing disabilities.
  • New Made for iPhone hearing aids: Apple will work with hearing aid manufacturers to introduce new hearing aids with high-quality audio and long battery life.
  • Dictionary improvements: for those of us who work with English language learners, IOS 6 will support Spanish, French and German dictionaries. There will also be an option to create a personal dictionary in iCloud to store your own vocabulary words.
  • Word highlights in speak selection: the ability to highlight the words as they are spoken aloud by text to speech benefits many  students with learning disabilities. Speak selection (introduced in IOS 5) now has the same capabilities as many third party apps in IOS 6.

These are the big features that were announced, but there were some small touches that are just as important. One of these is the deep integration of Facebook into IOS. Facebook is one of those apps I love and hate at the same time. I love the amount of social integration it provides for me and other people with disabilities, but I hate how often the interface changes and how difficult it is to figure it out with VoiceOver each time an update takes place. My hope is that Apple’s excellent support for accessibility in built-in apps will extend to the new Facebook integration, providing a more accessible alternative to the Facebook app which will continue to support our social inclusion into mainstream society. You can even use Siri to post a Facebook update.

Aside from the new features I mentioned above, I believe the most important accessibility feature shown today is not a built-in feature or an app, but the entire app ecosystem. It is that app ecosystem that has resulted in apps such as AriadneGPS and Toca Boca, both featured in today’s keynote. The built-in features, while great,  can only go so far in meeting the diverse needs of people with disabilities, so apps are essential to ensure that accessibility is implemented in a way that is flexible and customized as much as possible to each person. My hope is that Apple’s focus on accessibility apps today will encourage even more developers to focus on this market.

Another great accessibility feature that often gets ignored is the ease with which IOS can be updated to take advantage of new features such as Guided Access and the new VoiceOver integration. As Scott Forstall showed on chart during the keynote, only about 7% of Android users have upgraded to version 4.0, compared to 80% for IOS 5. What that means is that almost every IOS user out there is taking advantage of AssistiveTouch and Speak Selection, but only a very small group of Android users are taking advantage of the accessibility features in the latest version of Android.

Big props to Apple for all the work they have done to include accessibility in their products, but more importantly for continuing to show people with disabilities in a positive light. I loved seeing a blind person in the last keynote video for Siri. At this keynote, Apple showed another  blind person “taking on an adventure” by navigating the woods near his house independently. As a person with a visual disability myself, I found that inspiring. I salute the team at Apple for continuing to make people with disabilities more visible to the mainstream tech world, and for continuing to support innovation through inclusive design (both internally and through its developer community).

Accessibility in iBooks 2 and iBooks

Today’s post will focus on some of the lessons I have learned about the accessibility of ebooks created with iBooks Author and accessed on the iPad with iBooks 2.

I was pleasantly surprised to learn that Apple included an option for adding a description for images and other objects when it released iBooks Author. I don’t remember this feature being discussed much at the event where Apple unveiled iBooks 2 and iBooks Author, and only found out about it while test driving the software.

An even better surprise was learning that closed captions are now supported for any video that is embedded in an iBook. This is a great feature that will benefit a range of different learners (not only those with hearing disabilities). I think these new accessibility features of iBooks Author and iBooks 2 will go a long way toward facilitating the adoption of iBooks in the schools by meeting legal requirements for accessibility set by the U.S. government (for a summary of the legal requirements, please see the Dear Colleague letter and the follow-up clarification from the U.S. Department of Education).

Apple has published a support document  with  advice for making iBooks created with iBooks Author more accessible.  However, the article focuses mostly on the accessibility of images and other visual content, and does not include any information about closed captions. I would add a couple of bullet points to the advice given in the Apple support document:

  • the article suggests adding descriptions for all images, including background images. Web accessibility guidelines state that decorative images should have a null or empty alt attribute so that they are skipped by a screen reader, but there is currently no way in iBooks Author  to indicate that an image should be skipped by VoiceOver on the iPad. In my testing, I found that when you leave the description field for an image empty in iBooks Author, VoiceOver will read the entire file name when it comes across the image in iBooks 2. This is a problem because most people don’t use very descriptive file names before they add their images to a document. In my test iBook, I forgot to add a description for one of the placeholder images included in the iBooks Author template I selected. When I accessed the iBook on my iPad, VoiceOver read the following: “1872451980 image”. Imagine how confusing this would be to someone who is blind and relies on the VoiceOver screen reader to access content in iBooks.  For the time being, I would suggest following the guidance from Apple and marking up all images, including those that are used for decorative purposes, but I would recommend marking up  decorative images (those that don’t add any content that is essential for understanding) with the word “Background” in the description. By default, VoiceOver will say the word “image” so it is not necessary to add that to the description. While it would be better for the image to be skipped by VoiceOver if it is not essential, I would rather hear a quick, single-word announcement that is much easier to ignore than a long number read aloud in its entirety by VoiceOver, or an unnecessary description for an image that does not add in any way to my understanding of the content.
  • as much as possible, image descriptions should focus on the function of each image rather than its visual appearance. Writing descriptions (or alternative text as it is more commonly known in the web accessibility world) is as much an art as it is a science, and much of it is subjective. There are many sites that provide information on how to write good alt text for images on websites, but I have found very little guidance on how to write descriptions for other online content such as ebooks. My recommendation would be to focus on three C’s when writing descriptions for images in iBooks Author: Context, Content and Conciseness. First, I would ask myself if the image is properly described in the surrounding text. If it is, then it might be more appropriate to mark it up as a decorative image (“Background”). Next, I would ask myself “what information does this image convey?” and focus on the key idea or concept supported by the image rather than its visual details. There could be a few exceptions where you might need to focus on the visual details of the image, but these cases should be the exception rather than the rule. The final consideration is to keep the description as brief and concise as possible. I would try to keep it to no more than 8-10 words if possible.

The second aspect of accessibility supported in iBooks Author is closed captioning. If a movie added to an iBook in iBooks Author has been captioned, you can view the captions in iBooks 2 on the iPad by going to Settings, Video and making sure Closed Captions is set to On. If you know a file has been captioned and you don’t see the captions on the iPad, you may need to go into the Settings app and turn the captions off and then on for the captions to show up. This appears to be a bug that will likely get fixed in a future update to iBooks or IOS.

To create a captioned file, I have found that a workflow using MovieCaptioner and Compressor has worked well for me. I like MovieCaptioner for creating the captions because it is affordable and easy to learn. To learn more about how to create captions with MovieCaptioner you can view this tutorial I have made available on the Tech Ease website at the University of South Florida.

The only difference with my current workflow is that rather than exporting a captioned QuickTime video file from MovieCaptioner I’m only using the software to create the SCC file that has the caption text and timecodes. I then use Compressor to make sure the video file is in the correct format for the iPad and to add the captions. I found that when I exported the movie from MovieCaptioner I would get an error message in iBooks Author and the software would refuse to import the movie. Once I have exported my SCC file (Export > SCC in MovieCaptioner), I use Compressor to combine the two as follows:

  1. Open Compressor and choose Add File from the toolbar, then locate the desired video on your hard drive.
  2. In the Settings pane (Window > Settings) choose the Destinations tab, then find Desktop (or your preferred destination ) and drag it into the Batch window.Drag Destination from Settings pane to Batch window.
  3. Switch to the Settings tab and choose Apple Devices, H.264 for iPad and iPhone, then drag that setting on top of the destination in the Batch window.
    Drag H.264 for IPad and iPhone setting into the Batch window
  4. With your movie selected, open the Inspector (Window > Inspector or click the Inspector button on the toolbar), select the Additional Information tab and then Choose to find the SCC file on your computer.
    Select Choose from the Additional Information tab in the Inspector
  5. Select Submit to start the export process.

Once your movie has been exported from Compressor you should be able to drag it right into your iBook in iBooks Author to add it as a widget. As with images, make sure you provide a description in the Inspector.

Students with disabilities have traditionally had a difficult time with access to textbooks. iBooks Author provides a platform for making textbooks more accessible for all learners as long as a few accessibility principles are kept in mind. What an exciting time to be working in educational technology and accessibility!

Authoring ePub documents for the iPad with Automator, TextEdit and Text to Speech

The website Mac OS  X Automation has a great tutorial on how to use some of the new text to ePub automator actions that are available in Mac OS X Lion, and they have even put together a few automator workflows to make the process easier. I was inspired by the information they had on their website to see if I could create my own ePub document using the information they provided, but I added a twist: I added a recording of the text at the beginning of each chapter and this recording was created using the excellent Alex voice available with the Text to Speech feature in Mac OS X. The tutorial is now available on YouTube (and it is closed captioned). I think having an audio version could be beneficial for students with learning disabilities by providing the content in another modality. While the iPad and other IOS devices already include a great screen reader in VoiceOver, the voice available on those devices is not as good as Alex is, so this is why I decided it might be a good idea to provide the text to speech recording created on the Mac. Along the way to making this tutorial, I also learned about  new automator actions for converting video and audio files into the correct formats for ePub (and iTunes U). To use these actions, select your file(s), right-click on them and choose Services, Encode Selected Video (or Audio) Files. For audio this will result in an .m4a file saved to the same location as the original, and for video the format of the converted file will be .m4v.

Services, Encode Selected Video Files option when you right-click on a video file.

Overview of new accessibility features in IOS 5

With IOS 5, Apple has introduced a number of features to make their mobile devices even more accessible to people with disabilities:

  • VoiceOver enhancements: IOS 5 includes an updated voice for VoiceOver, the built-in screen reader for people who have visual disabilities. I have found the new voice to be a great improvement over the old one, especially when reading long passages of text in apps such as iBooks. Another improvement is that the triple-click home option is set to toggle VoiceOver by default. Along with the PC-free setup introduced with IOS 5, this small change has made it possible for someone with a visual disability to independently configure his or her IOS device out of the box, without any help from a sighted person. The Mac-cessibility website has an excellent overview of the many new changes in VoiceOver that I highly recommend reading.
  • Camera app compatibility with VoiceOver: this is a neat feature that will make photography more accessible to people with low vision and those who are blind. With VoiceOver on, if you launch the Camera app it will announce how many faces are in the frame. In my testing this worked pretty well, and I’ve used it successfully on the iPad and the iPod touch. It should work even better on the iPhone, which has a better sensor and optics. Combined with the ability to turn on the camera app from the lock screen on some devices (iPhone and iPod touch) by double-tapping the home button and the fact that you can use the volume up button as a shutter release, Apple has done a lot to make photography more accessible to people with visual disabilities.
  • Text selection showing Speak menu option.Speak selection (text to speech): This is one of my favorite features introduced with IOS 5. It provides another modality for students with learning disabilities who can benefit from hearing the text read aloud to them. To use it, go into Settings, General, Accessibility, tap Speak Selection and choose On. Once you’ve enabled this feature, when you select text a popup will show the option to Speak the text using the VoiceOver voice. Note that you can control the speaking rate for the speak selection feature independently from VoiceOver.
  •  Balance controls for audio: In addition to mono-audio, which combines both channels of stereo audio into a single mono channel, there is now an option for controlling the  left/right balance for stereo sound. On the iPhone, there is now also a special Hearing Aid mode that is supposed to make the device more compatible with hearing aids.
  • Handling of incoming calls: you can choose to automatically route incoming calls to the speaker phone feature of the phone, or to a headset.
  • New alert types: on the iPhone, you can use one of five unique vibration patterns to identify who is calling if you have a hearing disability, or you can create your own pattern by tapping it on the screen. These custom vibration patterns can be assigned in the Contacts app by opening a contact’s information, choosing Edit, Vibration and then Create New Vibration. There is also an option to have the LED  flash go off when you get a notification, a new message, and so on.
  • Assistive touch: this was one of the most anticipated accessibility features in IOS 5. Assistive touch was designed to make IOS devices easier to use for people with motor difficulties. For example, someone who is not able to tap the Home button to exit an app can now bring up an overlay menu with icons for many of the hardware functions of their device, including the Home button. Overlay menu for assistive touch.Assistive touch also includes options allowing for single finger use of many of the multi-touch gestures (including the new four finger gestures available only for the iPad and the pinch gesture used for zooming). To use assistive touch, choose Settings, General, Accessibility and turn on Assistive Touch. You will know assistive touch is enabled when you see a floating circular icon on the screen. Tapping this icon will open the overlay menu with the assistive touch options. Note that you can move the assistive touch icon to another area of the screen if it gets in the way. Please note that Assistive Touch is not compatible with VoiceOver. I really wish the two features could work in tandem. This would be helpful to users with multiple disabilities.
  • Custom gestures: assistive touch includes an option to create your own gestures. Update: I was able to create a few useful gestures after watching this video from Cult of Mac. I created one for scrolling up on a page and one for scrolling down. Now when I’m reading a long web page, instead of having to swipe up or down to scroll I can bring up the assistive touch overlay menu, select the new gesture from the Favorites group and tap once on the screen to scroll.
  • Typing shortcuts: under Settings, General, Keyboard you can create shortcuts for common phrases. For example, you could create a shortcut that would enable you to enter an email signature by simply typing the letters “sig” and pressing the space bar. This feature should provide a big productivity boost to anyone who has difficulty entering text on their mobile device.
  • Siri and dictation (iPhone 4S only): the new personal assistant uses voice recognition and artificial intelligence to respond to a range of user queries that can be made using everyday language rather than preset commands. The Apple website has a video that demos some of the capabilities of Siri.  One of the amazing things about Siri is that it works without any training from the user. Along with Siri, the iPhone 4S also includes an option to dictate text by tapping a microphone button on the keyboard.  The ability to use your voice to control the device can be helpful to many different types of disabilities, including those who have disabilities that make it difficult to input text. One of the things I have found especially frustrating when using VoiceOver on IOS devices is inputting text, so I hope this new dictation feature makes that easier. I will have a chance to test it out more thoroughly once I get my own iPhone 4S (currently out of stock in my area). Update: I finally got my hands on an iPhone 4 and I tried using the dictation feature with VoiceOver. It is working really well for me. I find the microphone button on the onscreen keyboard by moving my finger over it, double-tap to start dictation (as indicated by a tone) and then I double-tap with two fingers to stop it. Even better, after I’m done dictating the text, if I move the phone away from my mouth,  it automatically stops listening! I love this feature.
  • Word selection showing Define menu option.Dictionary: While it is not listed as an accessibility feature, having a system dictionary is a new feature that is great for providing additional language supports to students with learning disabilities. To use this feature, select a word and a popup will show the Define option that will allow you to look it up using the same dictionary that has been previously available only in iBooks.
  • iMessages: a new  add-on for the Messages app makes it possible to send free MMS messages to any owner of an IOS device. Many people with hearing disabilities rely on text messaging as a convenient means of communication. The iMessages will be especially helpful to those who are on a limited text messaging plan.
  • Reminders app: The new Reminders app has a simple interface that will make it a nice app for people who need help with keeping track of assignments and other tasks. On the iPhone 4 or iPhone 4S, tasks can be tied to a location using the phone’s GPS capabilities. One use of this feature could be to set up a reminder for a person to take their medication when they get to a specific location, for example.
  • Airplay mirroring (iPad 2, requires an Apple TV): along with IOS 5, a recent firmware update for the Apple TV enables mirroring to a projector or TV using Airplay. I can see this option being helpful in a class where there are students in wheelchairs who have difficulty moving around the room. Using air mirroring, the teacher could bring the iPad 2 to the student and the rest of the class could still see what is displayed by the projector or TV.
The new accessibility features make IOS 5 a must-have update for anyone who has a disability, as well as for those who work with individuals with disabilities. For schools and other educational institutions, the accessibility features of IOS make Apple mobile devices an ideal choice for implementing mobile learning while complying with legal requirements such as Section 504, Section 508 and the Americans with Disabilities Act.
Disclosure: I am an Apple Distinguished Educator.

Two new features for screencasting in OS X Lion

As I was looking through the list of 250 new features in OS X Lion, I came across two that I think will be helpful to teachers and anyone who creates screencasts (screen recordings). QuickTime in OS X Lion includes the ability to record a region of the screen, not just the full screen. This feature is helpful when you just want to record one application window. Another feature that is helpful is the ability to show mouse clicks while recording. This feature will make it easier to follow the action on the screen as you watch a screen recording. Now if only Apple would add a pointer to the iPad when it is in mirroring mode that should be a big help for classroom demonstrations.