Slimming Down those Video Files

cc licensed photo by alancleaver_2000

One of our faculty came to us with the following challenge: we want our pre-service teachers to video tape themselves in the classroom and then upload the video somewhere where the faculty member can view it and provide comments about the teaching practices shown in the video. I should add that this is an online class. One of the options the faculty member considered was using VoiceThread for providing the feedback to each student. I thought that was a pretty cool use of VoiceThread, but there was one big problem. Even with the education/pro version of VoiceThread there is a 100MB limit on the sizeof the files. That was probably not going to work, so the next thing I had to look for was a great compression tool that would allow our pre-service teachers to keep their file sizes within the limit imposed by VoiceThread.

I knew about Evom, which we have been using as a replacement for the excellent, but now retired VisualHub. Evom is really easy to use, free, and does a decent job with the compression, but it’s Mac only and many of our pre-service teachers are still using Windows computers. After searching around a bit and trying a few different tools, I think I found one that will do the job and meets all the requirements: it’s free, easy to use, and cross-platform. The name of the tool is Miro, and while it is not intended to be just a compression tool, it does a great job of shrinking the file size while keeping the quality not just acceptable but pretty good.

Using Miro, I was able to take a file that was 54MB and reduce it to just 1.4MB. I compared Miro to Evom using the same MP4 settings and while the size of each file was about the same, the one created by Miro had by far the best quality with the fewest artifacts. I also like the fact that Miro looks a lot like iTunes (it was after all created to be a media management and podcast subscription tool). This should help make it more accessible to our pre-service teachers, many of whom are familiar with iTunes from owning iPhones and other Apple devices.

Converting a file with Miro is pretty easy: File, Open, then with the file selected choose one of the conversion presets from the Convert menu.
Convert Menu in Miro

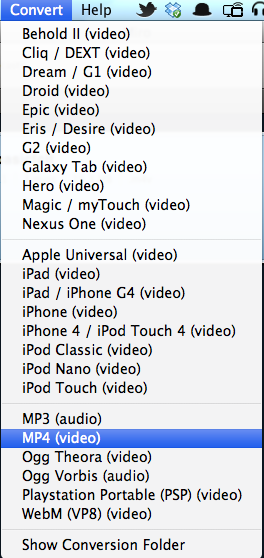
As you can see from the screenshot, presets are available for a range of Apple mobile devices (including different generations of the iPhone and iPod touch), as well as an Apple Universal one that I have not tried yet. The generic MP4 one I have used so far produced such good results, I can’t wait to try the other presets to see how well they do. I think Miro is a tool we’re going to be using a lot to make the files we upload to iTunes U smaller so that they take less time to both upload on our end, and faster to download on the end users end.

Miro is available for Mac OS X, Windows, and even Linux.

Updated: Miro does not seem to compress WMV files on Windows, which is odd since that is the format you are most likely to work with if you have Windows computer and are using Windows Movie Maker. Also, I found that there is a standalone conversion tool based on Miro called Miro Video Converter (for people who just want to convert/compress videos without installing the full Miro program).

5 tips for ePub accessibility

Closeup of iBooks app on iPad.I was scheduled to present at a workshop on ePub at ISTe 2011 along with a group of fellow Apple Distinguished Educators, but since I was not able to go to the conference this year, I decided to create this ebook to be distributed to the participants instead.  The ebook is in ePub format and can only be read on the iPad or another IOS device, or by using a desktop reader application such as Adobe Digital Editions or Calibre.  It is an enhanced ebook that includes a few embedded video tutorials. This means it is on the large size, so please be patient with the download time on your device.

This was my first time using Apple’s template for ePub creation with Pages, and I must say that it made it pretty easy to create the ePub. In the past, I created the ePub documents from scratch using my own styles for headings. The Apple template, which can be downloaded here, saved me some time and the resulting ePub document looks great.

To summarize the key points of the ebook:

If you are implementing new technologies at a college or university, you really should read the Department of Education’s Dear Colleague letter to college and university presidents regarding ereader devices, along with their follow up guide.  The follow up guide clarifies the following:

  • it is not just ereader devices that are covered by laws such as the ADA and Section 504 of the 1973 Rehabilitation Act, but any emerging technology. The new guide clarifies that online programs are also covered.
  • it is not just students with visual disabilities that are protected, but any student who has a specific learning disability or who otherwise has difficulty getting information from text sources (students with print disabilities).
  • the laws apply to elementary and secondary schools as well.
To make ePub documents more accessible, I presented the following 5 tips which are explained in more detail in the ebook:
  • use headings to split up long documents and provide structure and additional navigation in iBooks. The headings will be used to display a table of contents for navigating long ebooks.
  • provide captions or alternative text for images. At the very least provide a text caption underneath each image or video. This text should provide a concise description of the image’s content for those who use the VoiceOver screen reader.
  • provide a link to a captioned version of each video if you are creating an enhanced ebook that includes multimedia. iBooks does not currently read the captions when the video is embedded into the ebook. For this reason, you will need to link to a captioned version that can be accessed through the Mobile Safari web browser.
  • emphasize cognitive interactivity rather than just interface interactivity. Cognitive interactivity can be emphasized by asking questions and asking students to reflect on what they have read using the Notes feature of iBooks.
  • keep up with the ePub standard and become familiar with the new features available in ePub 3, such as media overlays.

Favorite Free Apps on the new Mac App Store.

When the new Apple Mac App Store launched on January 6th, I was at first really disappointed with the choice of free software available. However, there was a lot about the App Store itself to like.  One thing I really like about the Mac App Store is that it simplifies the software update process by making it extremely easy to update all of your purchased/downloaded software with one click (much the same way you update apps on an iPad or iPhone). I also like that it is tied to your iTunes account so that you can install the same software across several machines and keep them in sync without having to spend endless hours downloading the same software on each machine.

Now, I have not had a chance to do an extensive review of the accessibility of the app  (it is not part of iTunes but it’s own app accessed through the Apple menu or the Dock) but so far it appears to be good. The secret appears to be using the rotor to quickly move between the different sections.  In any case, I would think that a single app that supports VoiceOver, even if not perfectly, would be a much better option for someone with a visual impairment  than having to visit each individual website to purchase/download individual apps.

Of the paid apps, the standouts are Rapidweaver (a web design program I used to design my own website), Pixelmator (a graphic editor that should have most of the features needed by the average person who doesn’t want to mortgage their house for Photoshop) and the unbundled iLife ’11 and iWork ’09 apps (don’t use Numbers, fine don’t buy that one). Some of the software is available at a reduced price (Pixelmator is half price on the App Store). If you are a photographer, Aperture for only $80 (instead of $200) is a steal.

But this post is about the free apps, so here are the ones I have installed so far that I like:

  • Caffeine is a tiny program that runs in the menu bar and allows you to suspend your energy settings. It is perfect for when you’re doing a presentation or watching web video and don’t want to be interrupted by the screen reader, screen dimming and other energy saving features. Using the menu bar icon is much faster than opening the display preferences.
  • DropCopy allows you to copy files between any Apple devices, including your laptop or desktop and your iPad, iPhone or iPod touch (you will need to install a free companion app).
  • MindNode for Mac is a simple brainstorming/concept mapping app for those who are visual learners. The app doesn’t have all the bells and whistles of other programs such as Inspiration, but it presents a simple interface that is perfect for brainstorming ideas.
  • Alfred is now my favorite way to search my Mac and launch applications. It works much like Quicksilver. Press a key and a text box will open in the middle of the screen where you can type in your search term. I like that it is much simpler and appears faster than Quicksilver, which never really caught on with me.
  • TextWrangler is a pretty good text editor with features usually found on much more expensive editors (search and replace across multiple files, FTP and SFTP support, etc.).

So far the only program I’ve downloaded that I was not happy with has been Smart Recorder. I just didn’t find it that useful or easy to use. However, it is still on my list of Purchases, so if I change my mind and find a use for it, it will be there waiting for me to install it with just one click.

You will notice that my list has a heavy focus on utilities. Your list may be different depending on how you use your Mac.

2X the Productivity with DisplayPad

Ok, I may be exaggerating about the 2X boost in productivity, but DisplayPad has been one of the most useful apps I have purchased recently. With DisplayPad ($4.99), you can set up your iPad to serve as a portable secondary display for a laptop. When working with programs that have a lot of settings panels, such as Photoshop and other Adobe software, having a second display can save you a lot of time.

The app is really simple to set up and use. You will need to download a helper program that will run on your Mac. To start using DisplayPad, click on the helper program’s menu bar icon and choose your iPad (both devices need to be on the same Wifi network). Your iPad will then act just like any secondary display. Tapping with one finger will be the same as clicking with the mouse, and tapping twice will be the same as right-clicking. You can also drag with two fingers to scroll, just like on your laptop’s trackpad. I have been very happy with the performance. There is very little lag when you drag windows from your laptop screen to the iPad. I have even used DisplayPad with my regular secondary display to create a triple-display option when I use my laptop at home.

Creating Podcasts with the new iPod touch

In this post I will discuss two apps that work well with the new iPod touch for creating narrated slideshows that can be turned into podcasts.

The first app is SonicPics ($2.99, a free lite version limits you to 10 minutes and 3 images so you can try out the app). With the paid version the recording limit is 60 minutes and you can choose from three quality settings for the audio (Good, Better or Best, which is 44.1khz, 16-bit mono). To get started you select photos from your photo library on the iPod touch or you can take a photo with one of the built-in cameras. Each photo can have a title and description that can be displayed during the slideshow.

To narrate the slideshow, you’ll press the Record button at the bottom of the screen and then flip through the photos in the slideshow using the familiar iPod touch flick gesture. This makes it really easy to synch your voice with the slideshow. You can even pause a recording if you need to, and resume from where you left off. When you’re finished, several sharing options are available: you can share the video to your computer over Wifi if both devices are on the same network, you can upload the video to your YouTube account, or you can email it as an attachment if it is not too large (usually 10MB is the cutoff for most email accounts). The format for the exported video is .m4v, which is the format supported by iTunes (and iTunes U).

Overall, I found this app to be really easy to use and a good bargain.

Storyrobe (free) has many of the same features as SonicPics, but you’re limited to 3 minutes in the current version. I actually like this limit for podcasts created by students as it can encourage them to focus and not ramble on. Creating a story with Storyrobe is a three step process: select photos from your photo library or take a photo with the built in cameras, organize photos into the right order, and record your audio. While you’re recording, you advance to the next photo in your slideshow by tapping the Next Image button at the bottom of the screen.

As with SonicPics, you can pause in the middle of a recording and pick up right where you left off. The finished video can be uploaded to YouTube directly from the iPod touch, saved to your Camera Roll and transferred to your computer with iPhoto, or you can email a link to it. It looks like the video is saved as an .mp4 file, but it was not clear to me how long the recording would be available if you email it as a link (the actual file is saved on the developer’s site).

I found out while reading the comments on the app’s iTunes Store page that it used to cost $2.99 and is now free while the developer works on a second version (version 1.0 is the one currently available for download). I anticipate the new version will be priced at $2.99 to stay competitive with SonicPics and other similar apps.

So there you have it. Two inexpensive apps that allow you to create a podcast without using a computer. All the work (taking photos, recording narration, saving the movie) is done on your iPod touch.

VoiceOver language rotor in IOS 4

As a result of a Twitter conversation this past week, I learned (thanks to Pratik Patel) a neat new feature that has been added to VoiceOver for the iPod touch and iPhone with the release of IOS 4. When you go into the VoiceOver settings of these devices, you should find a new option: Language Rotor. The Language Rotor allows you to quickly change the language used by VoiceOver by turning an imaginary dial on the touchscreen. This feature has been available on some Mac laptops, where you can use the rotor gesture to navigate web pages by headings, links and the like. It was good to see that this gesture has been added for language selection in IOS 4. This should really benefit anyone who wants to use VoiceOver to read back a book in a different language with iBooks, or when you access a web page from overseas that is in a language other than English (I suppose language students would be helped out by this feature too).

By going into the VoiceOver preferences on an iPod touch or iPhone (Settings, General, Accessibility, VoiceOver) you can select Language Rotor and then choose the languages that will be available when you use the Language Rotor. There were 34 languages available on my device, and a nice touch is that for some languages you have some dialects available as well (Spanish from Mexico as opposed to Mexico, or French from Canada as opposed to France).

To use the Language Rotor, use the dial turning gesture on the iPod touch or iPhone touchscreen until you hear Language, then flick up and down to select from the languages you have selected to make available in the settings. Another nice touch is that there is a visual indicator as you turn the dial. This feature was added to help out sighted users when they work with people who have visual disabilities and use VoiceOver.

The Language Rotor should be available on the iPad when that device gets an update to IOS 4 in November.

Testing for accessibility with screen readers.

Accessibility NZ had a provocative blog post on whether sighted web developers should use screen reading software to test the accessibility of their sites. Based on a conversation I had with a fellow instructional designer, it appears that the blog post might be misunderstood.

The point the author is making is not that sighted developers should skip doing accessibility testing with screen readers and only rely on testing with people who are actually blind, but rather that accessibility testing should not end with the tools.  It can, and should, include both. The first past with testing tools can help you identify the most glaring problems and save you both time and money by letting you focus on the more difficult problems when you test with end users (which cost money to recruit)

Testing with a representative sample of people in the target demographic is just good instructional design anyway. The only difference in this case that we should not test with just the average user, but keep in mind legal requirements such as Section 508 and  include a variety of people in the testing before we can say a site is accessible. The more diversity the better. This will provide not only good accessibility information, but good usability information that will benefit everyone who visits the site.

The author on Accessibility NZ  made another good point: there are other disabilities out there. Yes, it is true that the web tends to present the biggest challenge to those who are visually impaired, but even within that population there are a range of needs. Someone like me who still has some sight will not use the same site in the same way as someone who is completely blind. I’m probably more like a sighted developer than someone who is completely blind, yet I could say a site is accessible based on my disability, but  my assessment would not be representative of most people who are bind. When testing, we need to consider a range of different needs.

This is one post where reading the comments is actually something I would recommend. I was impressed by the reasonable and civil way in which the people in the comments conducted the discussion around this topic, and the range of perspectives they brought to the table.

oMoby for iPod touch

Alena Roberts recently featured oMoby on her Blind Perspective blog. oMoby is intended as a shopping app, but as Alena has suggested it can have other uses for people with visual impairments. oMoby uses the iPhone/iPod touch 4G camera to snap a picture of any product you come across while shopping. The picture is then compared against a database and oMoby will provide you with a list of possible products/items. The fact that you don’t have to scan a bar code for this app to work makes it easier fo use for someone with low vision who might not be able to properly locate the bar code.

I had to try oMoby for myself to see how it works, and I was blown away with how well this app performs. Just like Alena, I wanted to see if I could use the app as a replacement for a currency identifier. I tried the app with both $1 and $5 bills and both times it accurately identified them. It had a more difficult time with coins (it could not correctly identify a quarter, only telling me that it was a silver coin). While not perfect for this purpose, oMoby is pretty good consideirng it is a free app.

The other thing to point out about oMoby is that I found it to work well with VoiceOver, the screen reader now included with all new iPod touch and iPhone models. So, to sum up, oMoby is a shopping app that has the potential to replace a much more expensive currency identifier used by those with visual impairments, and it can do it for $0 dollars. Not a bad deal.

Here is the link for it on the Apple Store.

My first week with the new iPod touch.

My iPod touch finally arrived and it has now been a week, so I’ve had a chance to take it through the paces. I really believe this is the best iPod Apple has ever made.

Pros: good video quality, ability to post video directly to YouTube, multi-tasking and other IOS 4 improvements, good battery life and performance with A4 processor, FaceTime video calling, accessibility features in the entire iPod touch lineup, no phone contract with ATT&T.

Cons: lackluster still camera, so thin sometimes you have to struggle to use the volume buttons on the side of the device.

Of course there are all the features we who have owned an iPhone or a previous version of the iPod touch have gotten used to, but three new features set this device apart: FaceTime, high resolution video + still cameras, and the addition of the A4 processor (the same type used for the iPad).

The addition of the two cameras, which has made possible FaceTime video calling over WiFi,  was one of the big things that made me want to get the new iPod touch. However, I found it kind of difficult to connect with others using FaceTime. This should be less of a problem as FaceTime becomes more established throughout the Apple ecosystem (there is a rumor it could come to iChat soon, which would really increase the number of people you could connect with). When I was able to connect with someone, FaceTime worked great. The video quality using the front facing camera was pretty good. While there were times when the video got jerky and froze, as with any video app this was probably  due to the speed of the Internet connection at both ends of the call. Overall, I was pretty happy with FaceTime and cant’ wait until I have more people using it.

Of the two cameras, the video camera is the better one. While I do not have an iPhone 4 to compare the iPod touch to, I do have a Kodak zi8 that takes pretty good 720p video and 5 MP still images. There are plenty of  side to side comparisons posted online if you want to see a head to head battle of the two iDevices, but in my opinion the difference between the two is not that great, especially if you just plan to post video to YouTube where it is going to be compressed with a loss of quality anyway. The video camera on the iPod touch does not have a zoom, which is a big thing the iPhone 4 (and the Kodak camera) has going for it (even if it is only a digital zoom). The low light performance of the iPod touch is also somewhat weak. For taking video in well lit conditions (such as vacation footage shot outdoors) this camera will do the trick. It also has the advantage of being able to post the video directly to YouTube (or MobileMe), rather than having to wait to transfer the video to a computer first, then uploading to YouTube. This feature alone makes the iPod touch a worthwhile portable video camera.

The still camera will do if you really don’t want to miss a shot, but it is not really an adequate still camera at less than 1MP resolution. Just like the video camera it really struggles with low light conditions, where the pictures get so grainy they are sometimes unusable. Again, outdoors things do get a little better, and the fact that you can now use a bunch of the same photo apps available for the iPhone helps (my favorites are Photogene, Best Camera, and Camera Bag). As long as you remember its limitations, the iPod touch still camera will do fine for Facebook, where the feeling of the moment and getting the shot is often more important than its quality.

The addition of the A4 processor makes this iPod touch a great portable gaming device, but it’s not something that will blow you away, unless you’re like me and you have been suffering with an older iPhone with a hacked OS. Given my point of comparison, I was very impressed with how well this new device handles games. The new iPod also has pretty good battery life, which is more important to me than an incremental bump in processing speed and performance. However, with the A4 processor, the new iPod touch does a great job of handling multi-tasking. Opening and closing apps also happens pretty fast, and it is nice to be able to listen to music on Pandora while checking email and texting. This will make you use your older iPhone or other iDevice much less once you get used to it.

Last and not least, one of the big reasons for getting this iPod for me is that it finally includes VoiceOver and other assistive features even at the base model, which is the 8GB model I ordered. Apple should be applauded for including these technologies throughout their entire iPod lineup, rather than limiting its availability in the higher capacity (and more expensive) models. While most people will not need these features (or even know they are included), as an educator I am pleased to see them made available to everyone who purchases the new iPod touch. This will go a long way toward making the iPod touch a viable educational tool I can use in the classroom to support all students.

Awareness app for iPod touch

Cost: $4.99

iTunes URL: http://itunes.apple.com/us/app/awareness-the-headphone-app/id389245456?mt=8

Awareness bills itself as the “headphone app for the iPhone.” It is an app that lets you listen to music and other audio content on an iPod touch/iPhone while also picking up on ambient sound.

I have wanted an app like this because I really like listening to music on my iPod touch/iPhone (I have both) but I also need to be aware of my surroundings since I have limited vision.  I could not believe how well this app worked. At first I thought the price was kind of high for a one-trick pony, but given how well it works I think it’s worth it. It actually freaked me out a bit the first time I used the app while walking around my college campus. It was weird that I could hear people talking before they came into view. For a while, I felt “bionic”. The app is so sensitive (you can adjust this in the settings) that it even picked up the sound of my cane as I tapped on different surfaces during my walk.

This app would definitely be a big help to anyone who has a hearing impairment (including those who are losing their hearing due to old age and need some help hearing the tv, etc.). The cost and convenience would make it a great alternative for providing accommodations to students with hearing impairments in educational settings (it could replace a sound amplification system).