It’s that time of the year again. The supplies and textbooks have come in. The room is decorated. Soon students will be walking through the door and it’s off the races. A new school year is upon us.
If you are lucky, you have a classroom set of iPads, or you may be in a BYOD situation where students are bringing their devices to school. Did you know about some of the features built into the iPad and other iOS devices that can help you empower all learners to access the curriculum this year? No? Well that’s what this post is about. You don’t need to have any students with IEPs or Section 504 plans to take advantage of these features. They are called universal design features because they can benefit any of a number of learners. Here are the top seven.
Embiggen the text
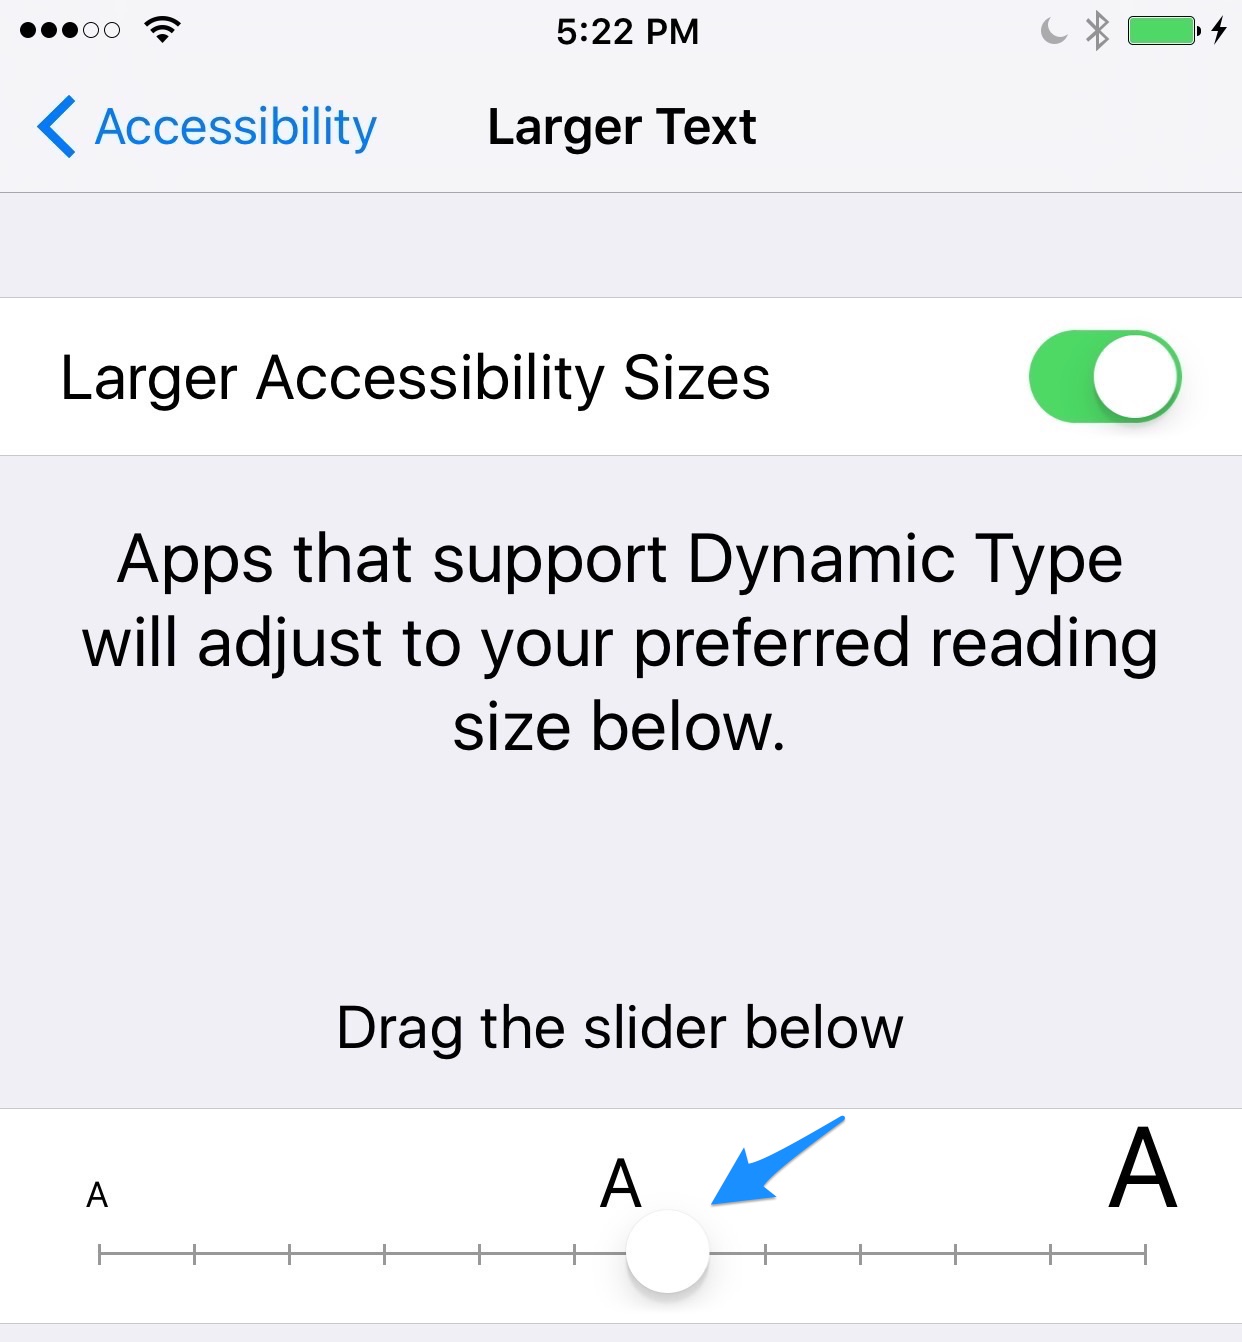
Yes, I know that’s not a real word (except maybe on The Simpsons) but it means to make the text larger. On iOS devices, this is easy to do and by making the text bigger you will allow your learners to focus all of their energy on understanding the content rather than squinting and struggling to see it. To make the text larger, go to Settings > Display and Brightness > Text Size and use the slider to adjust the size as needed. Not big enough? No problem. Go to General > Accessibility > Larger Text instead. There you can turn on even Larger Accessibility Sizes. While you are it you may as well turn on Bold Text to make that text really stand out.
It’s like a negative
Well at least to you…your students probably don’t know what a negative from the film days is, seeing as the only photos they look at are probably on Instagram or Facebook. In any case, reading on screen can be very tiring for our eyes, with all that light coming at us from the screen. As our leaners spend more of the day in front of the screen one thing we can do is reverse the colors to help with eye strain. It’s really simple to turn this feature on and off, so why not try it. If it doesn’t work you can easily go back to the default black on white scheme. Invert colors can be found under Settings > General > Accessibility, or even better just use Siri to turn this feature on/off by saying “Turn on Invert Colors.” The kids will love that trick.

Let’s hear it for Alex
Alex is not a person, though if you spend some time listening to him reading content on the iPad you may begin to think he is. Alex is the built-in high quality voice that has been available on the Mac for a number of years. Guess what? Now it’s available as a download for use with the text to speech feature built into iOS, officially called Speak Selection. This feature can even highlight the words as it reads them aloud, which can be a big help to some struggling readers. The video explains Speak Selection in more detail.
Speak Selection works great with the Reader feature built into Safari, which removes ads and other distractions from the page. In the upcoming iOS 9 release the Reader feature gains controls for adjusting the text size as well as changing the background and font for even better legibility.
Let’s hear that again
Don’t want to select the text first? No problem. Speak Screen is activated with a special two finger gesture and will read everything that is on the screen (and I do mean everything). Once you turn on Speak Screen in the Speech settings, you can perform a two-finger swipe from the top of the screen (except on the Home screen) to hear everything read aloud. Even better, have Siri help out. Just say “Speak Screen” and it will start reading. You even get an onscreen controller for adjusting the speaking speed.
You complete me
Although it is not technically an accessibility feature, the word prediction built into iOS 8 (QuickType) can be a big help for learners who struggle with spelling or just have a hard time producing text. This feature should be turned on by default but if not you can enable it by going to Settings > General > Keyboard and making sure Predictive is turned on. When you start typing a word, suggestions should pop up in a strip just above the onscreen keyboard.

Say it with me…Dictation is awesome.
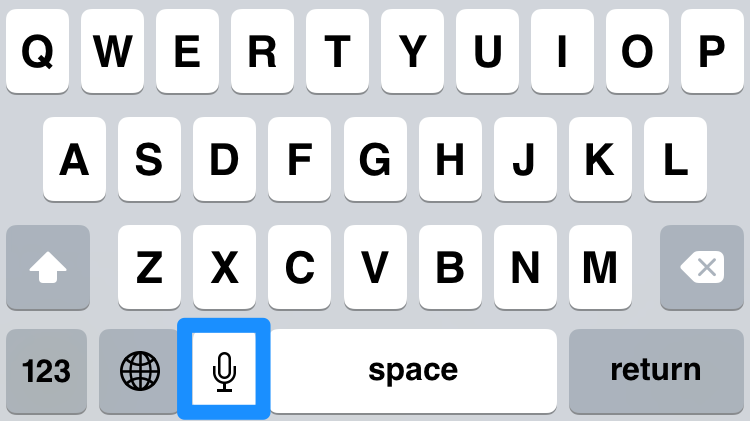
Again, this is not technically an accessibility feature, but it can help those who struggle with typing on the onscreen keyboard by giving them another option: their voice. Just make sure it’s your announcer’s voice by speaking clearly and enunciating as you tap the microphone icon to the left of the space bar to start dictating. You can even use a number of commands, such as “comma,” “period,” and “new line.”
CC is not just for copy
It also stands for closed captioning, a feature that is built into many videos for those who are unable to hear the audio. Closed captions can benefit a number of other leaners: English language learners, struggling readers, and anyone learning a topic with specialized vocabulary where seeing the words as well as hearing them could be helpful (science, for example). And as a bonus you will have a fallback for when your speakers just don’t work (because technology never fails, right?). You can enable the captions for a video that has them by going to Settings > General > Accessibility and choosing Subtitles & Captioning. You can even change the appearance of the captions to make them easier to read.
Have an Apple TV in your classroom? It too has support for captions. Just go to Settings > General > Accessibility > Closed Captions + SDH to turn them on. Just as with your iOS device, you can change the appearance of the captions on Apple TV.
There you have it. A few more things to have in your tool belt as you work to ensure access to learning for all of your students this year, which I hope will be a great one!
